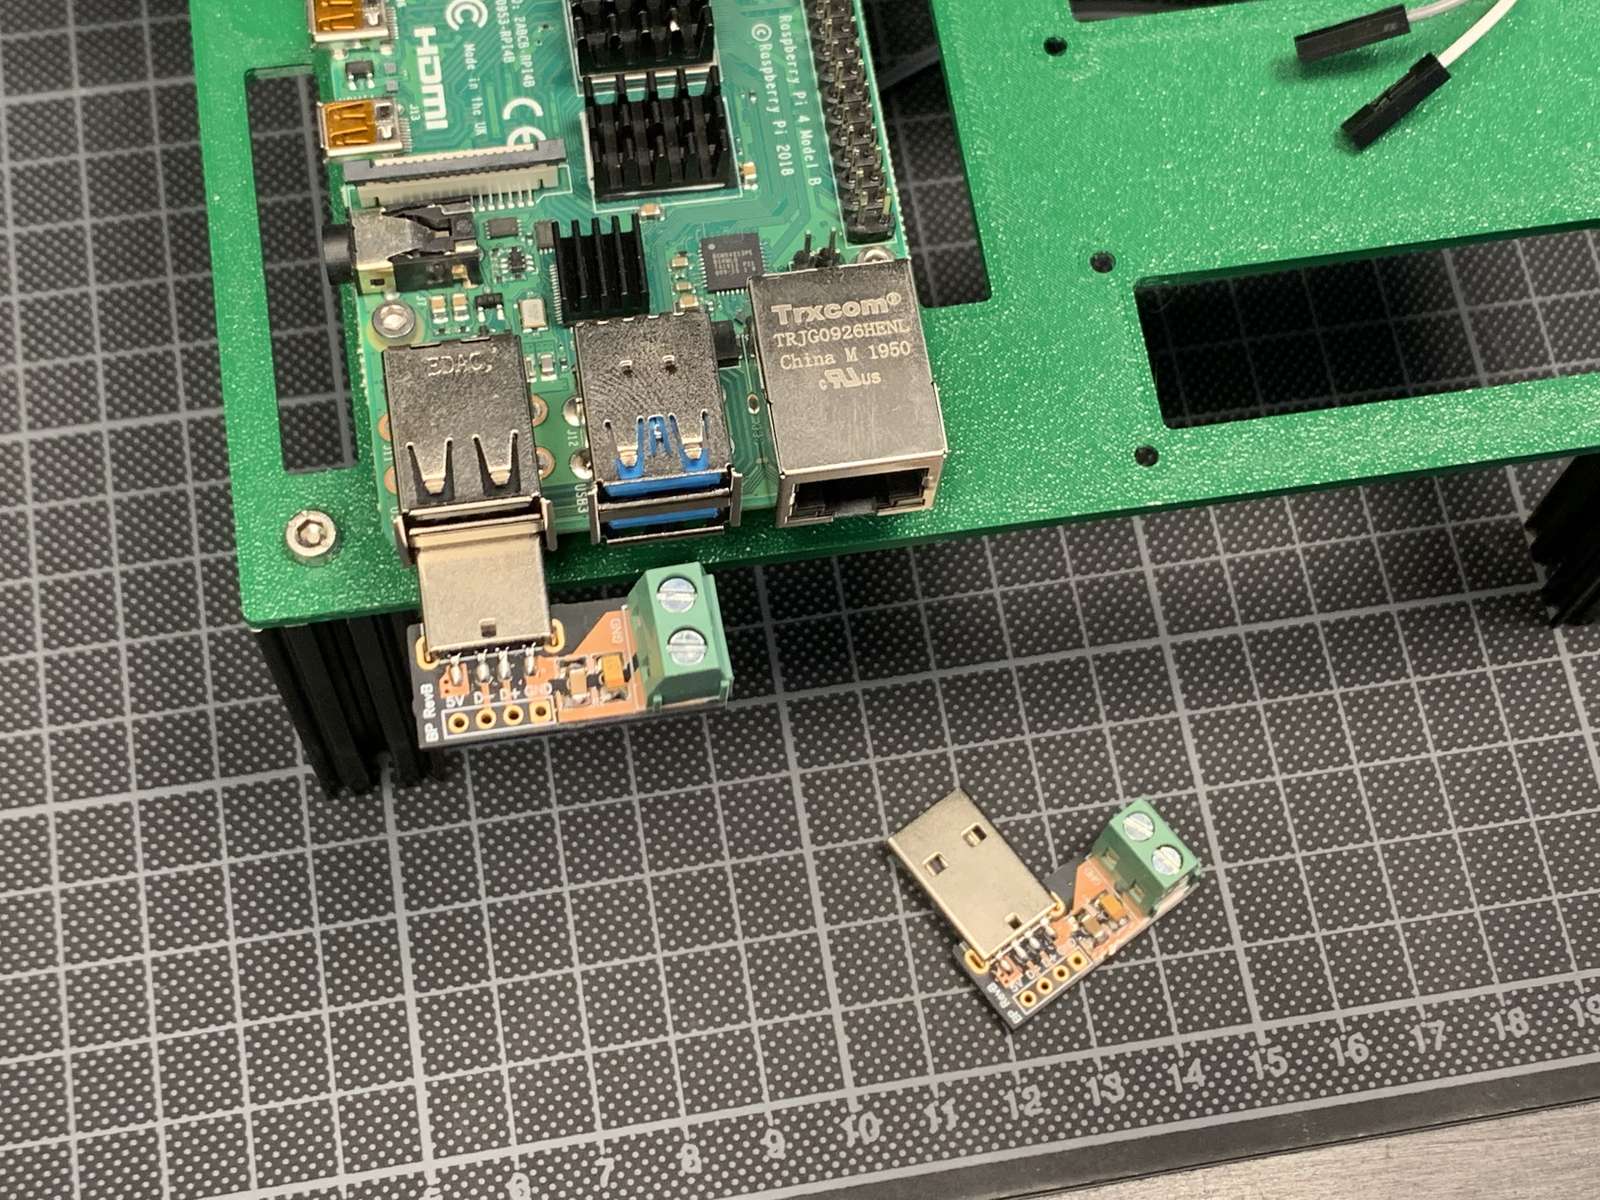
Sometimes it’s not possible or really tedious to get a USB cable to the USB connector for power input on a Raspberry Pi. Since the 5V pins, the USB power connector, and the USB hub share the same power rail, it doesn’t matter where the electrons enter and exit. The only difference is that the Pi has a few capacitors, a resettable fuse, and a diode directly behind the USB input. When powering the Pi via the 5V pins on the 40pin header, this protection and the capacitors to deal with sudden power draws won’t work. This applies as well to the USB hub.
To make back-powering the Pi via the USB hub a bit more convenient, I made these backpower adapters that contain the same resettable fuse, capacitors and diode as the Raspberry Pi design.
You can find the schematics and EasyEDA design files here.
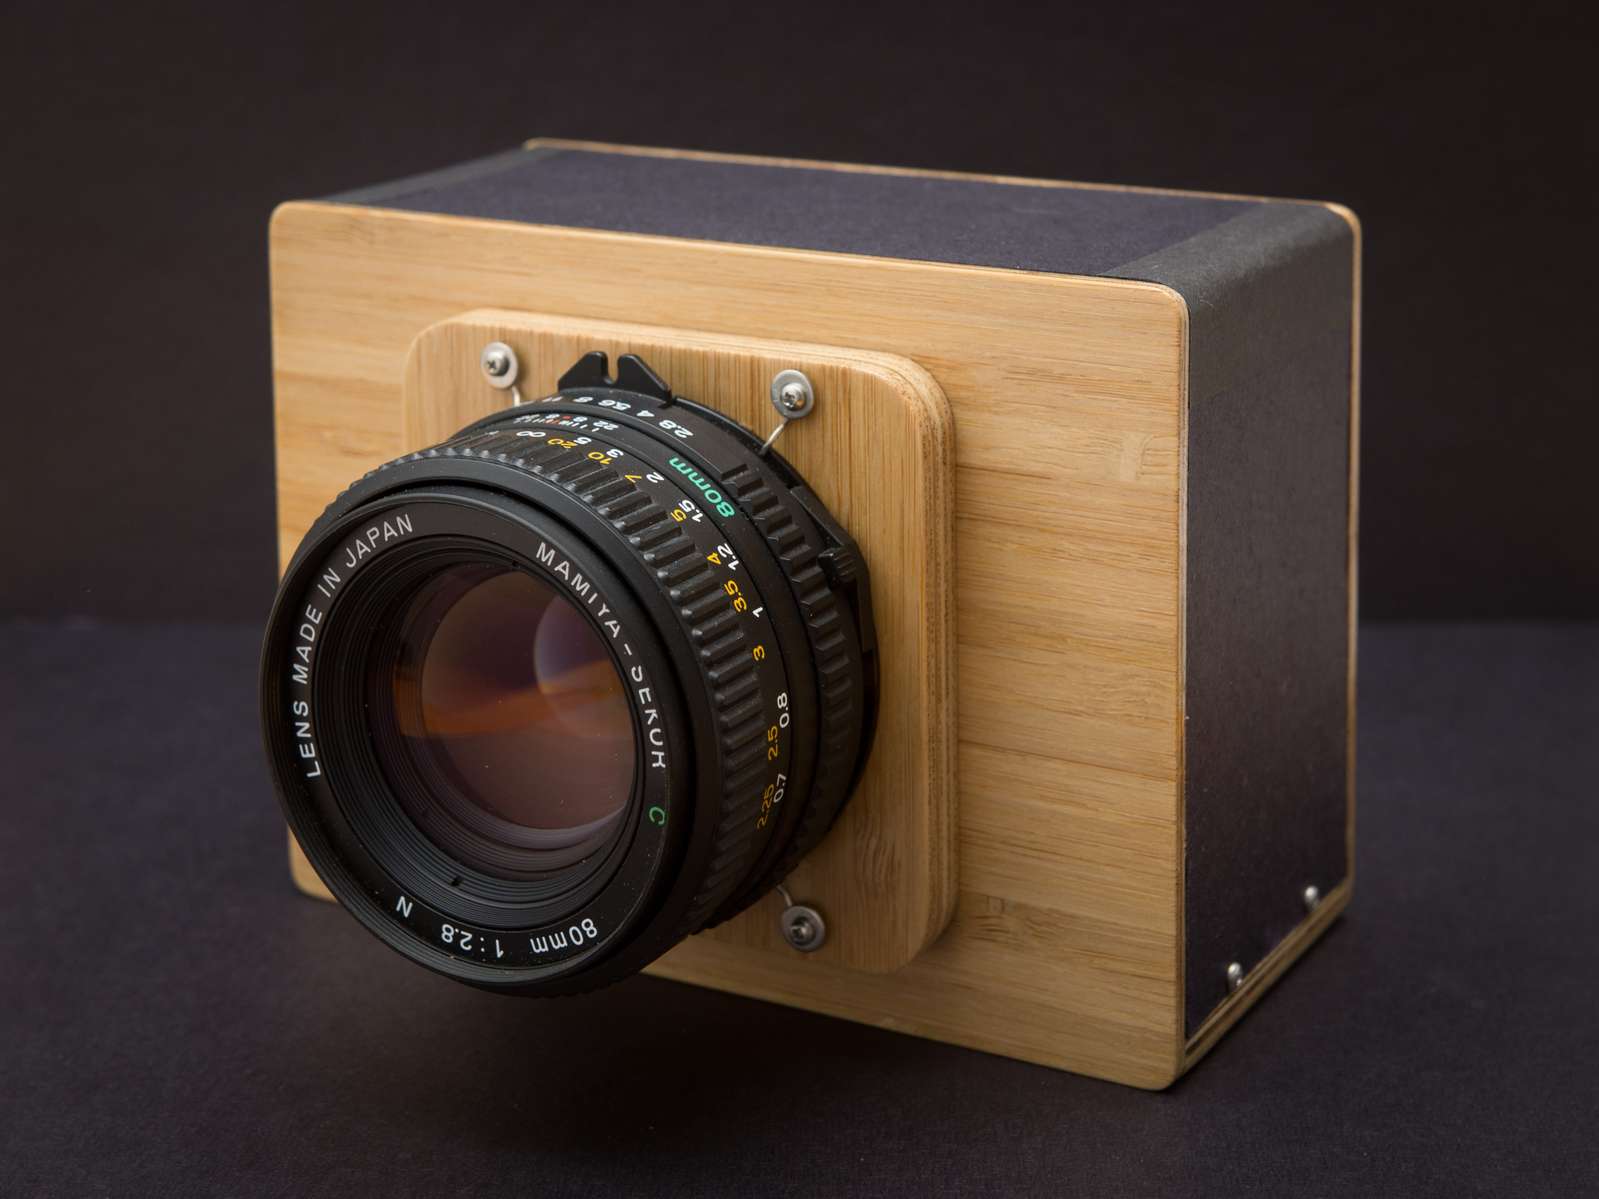
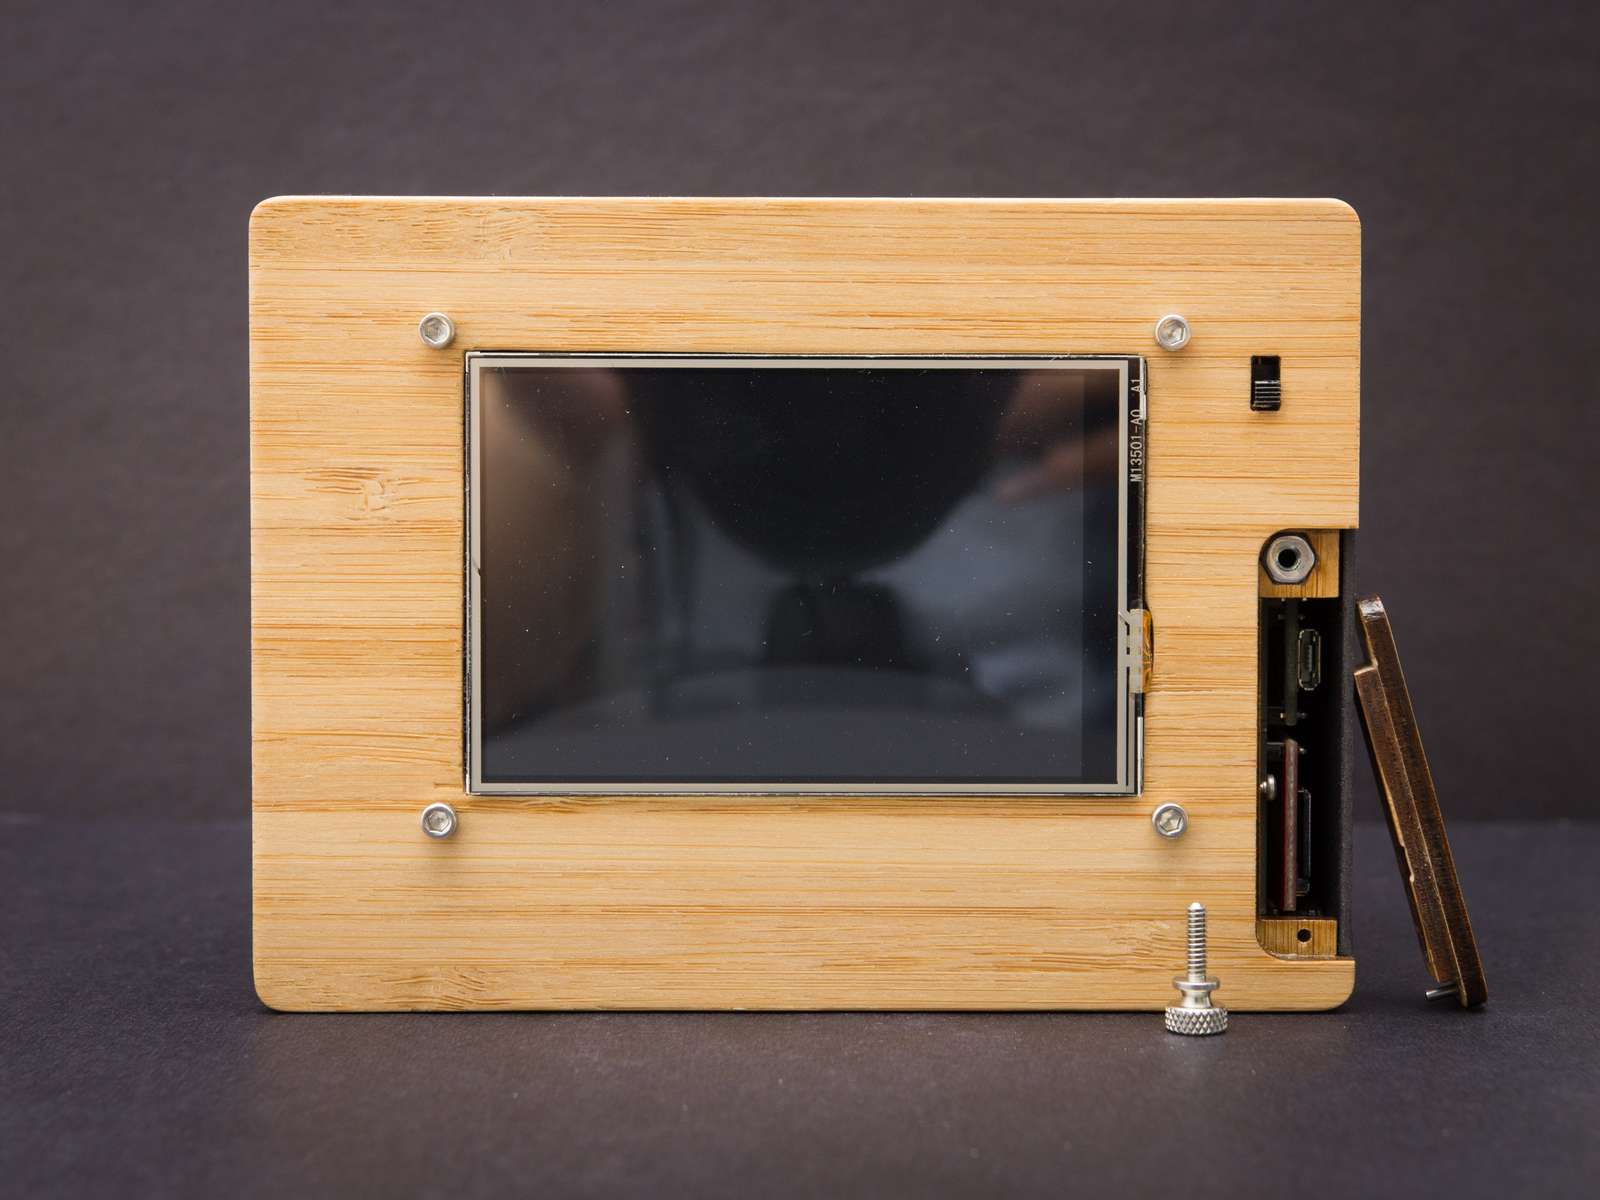
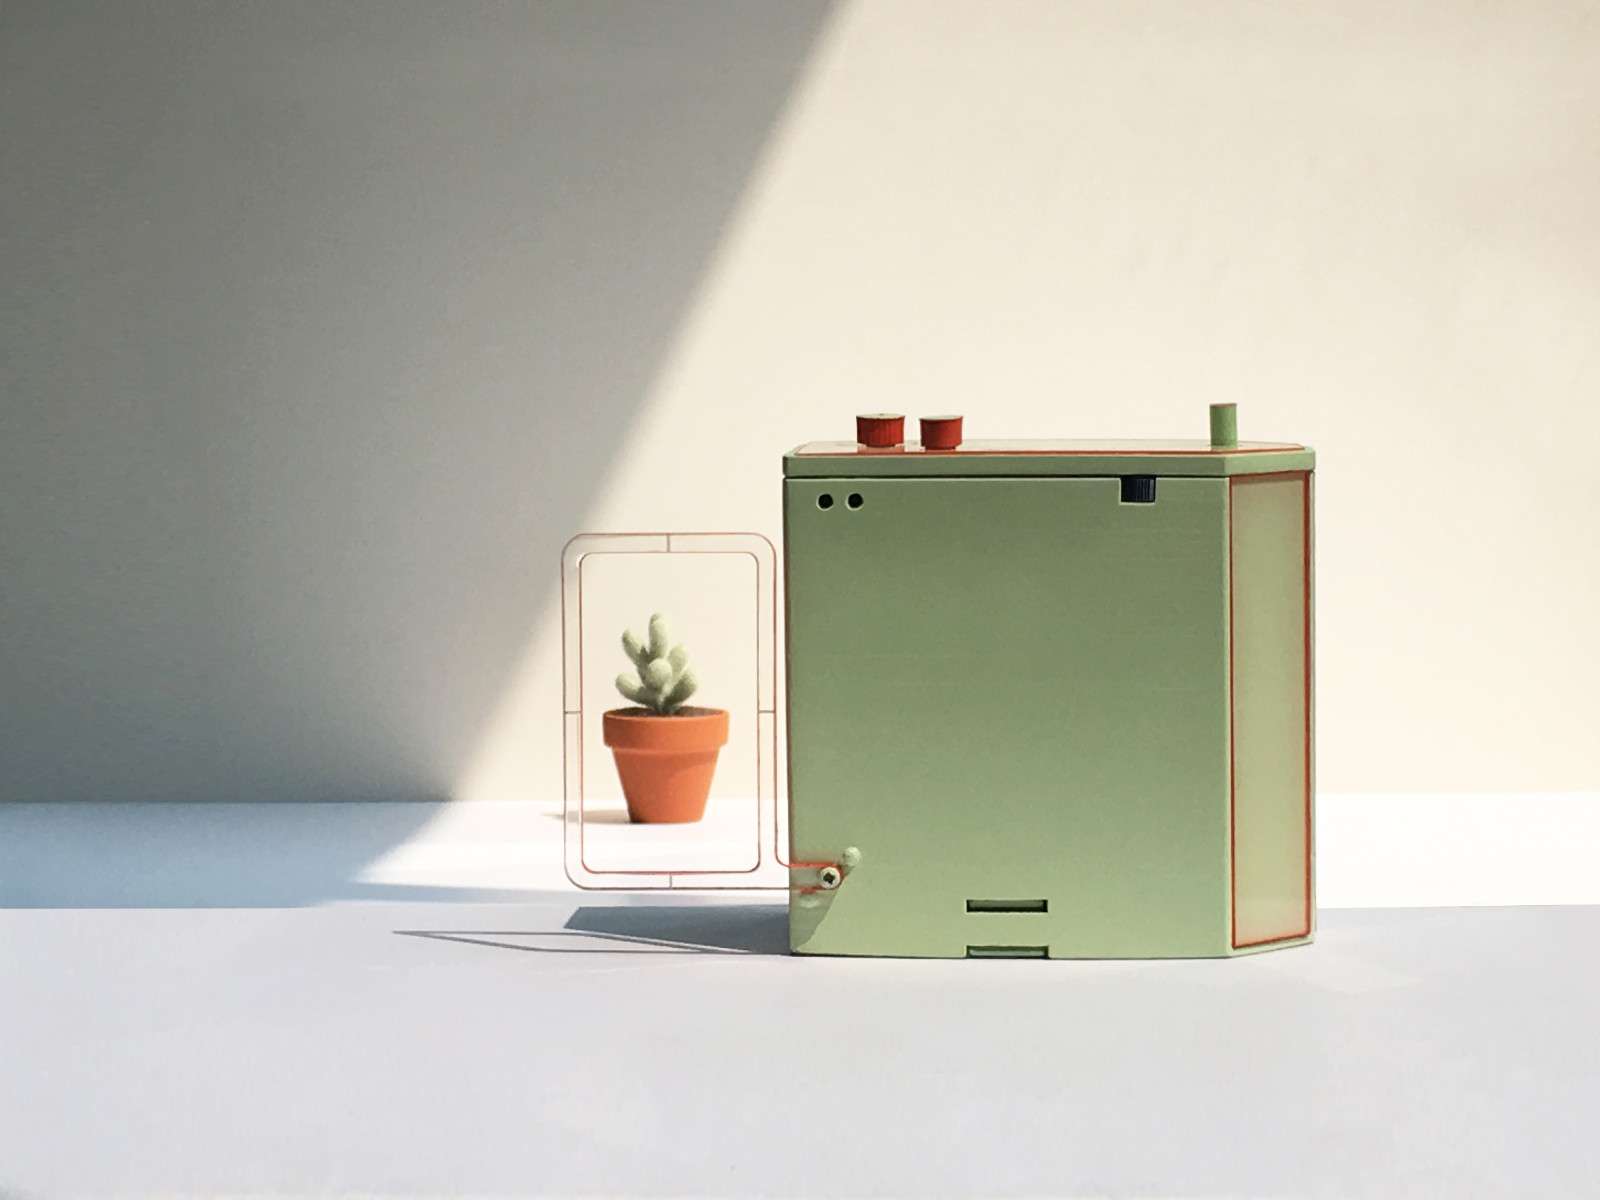
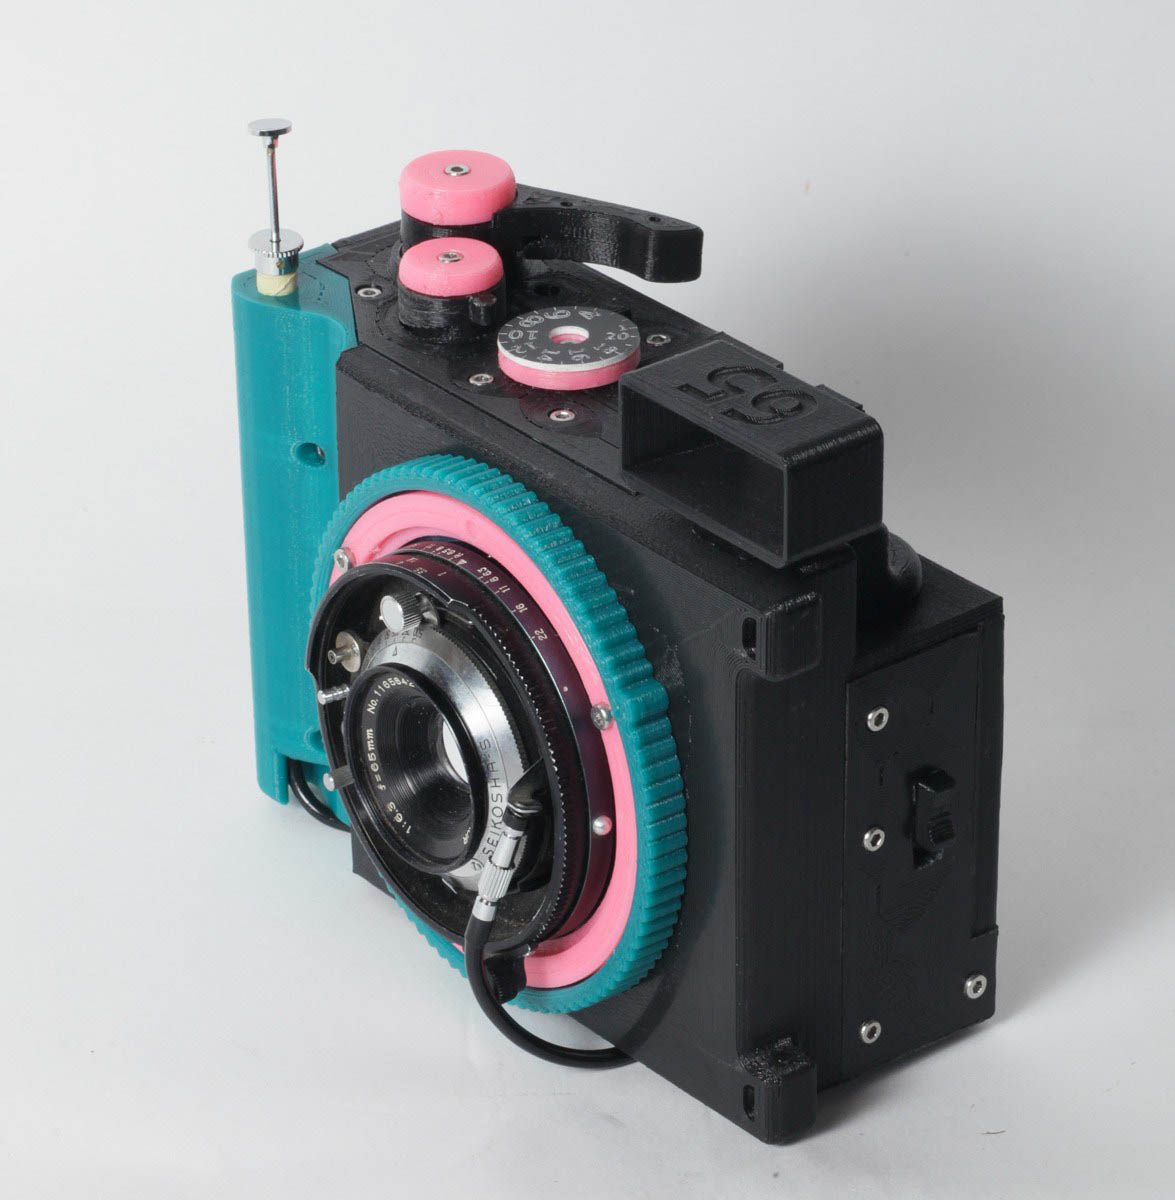
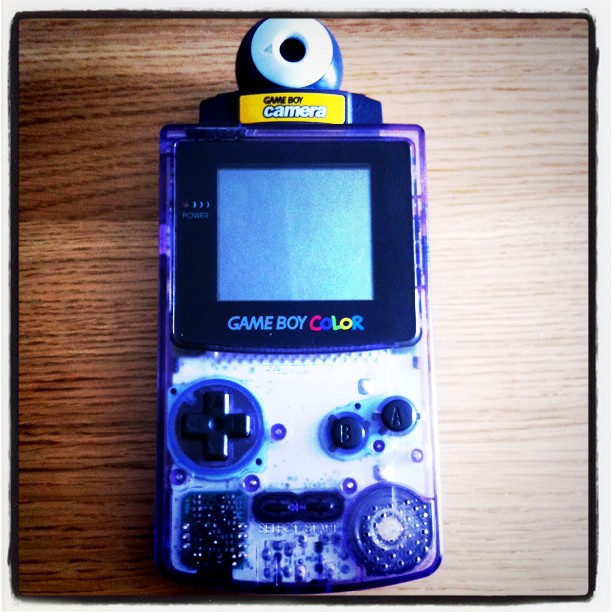
I have a soft spot in my heart for really weird contraptions to take pictures. A non-exhaustive list of at least slightly unusual cameras which may get updated from time to time…
The Brancopan - A 3d-printed panoramic camera that was crowdfunded to make the plans available to everyone
(made by the pretty cool Cameradactyl people)
The GameBoy Camera (of course) - the smallest and cheapest digital camera of it’s time
Sometimes one may require a non-planar mirror. Usually you can do that by turning and polishing a chunk of metal on a lathe until it is so smooth that the metal works like a mirror.
Or you can achieve a mirror surface by grinding a piece of glass or coating plastic in a vacuum chamber. All of that is pretty slow and expensive.
But is there maybe an easier or faster way at the cost of a bit of precision? (yes)
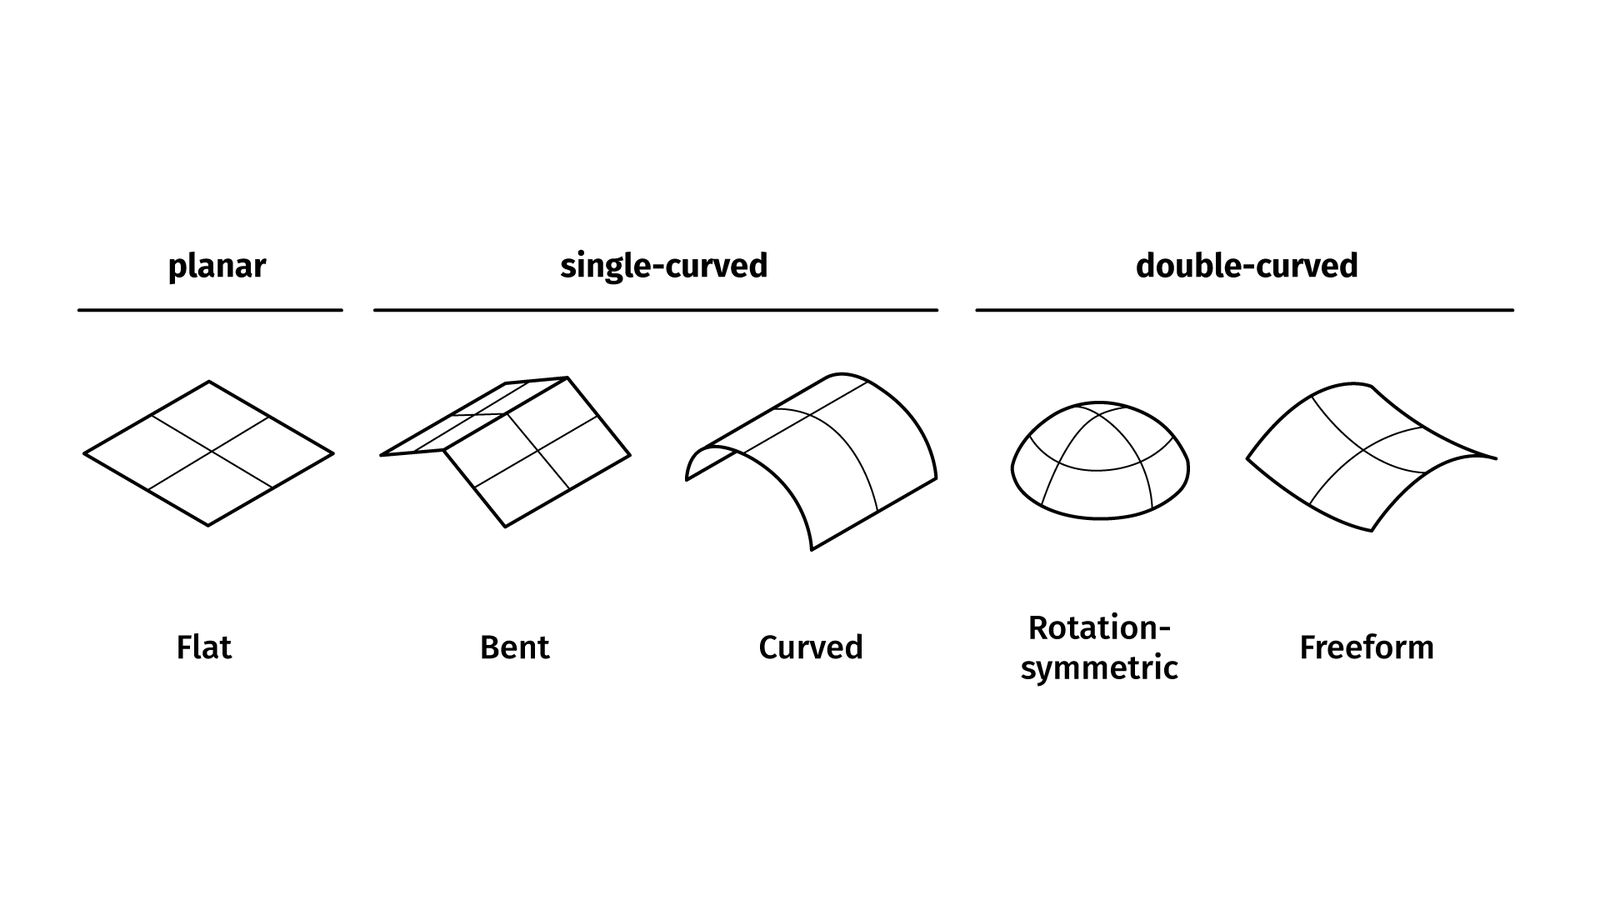
In general there are three different types of shapes:
The material I use is laminated and metallized polystyrene. Since there is already a mirror surface on the material we don’t need to coat it as a second step. And as a thermoplastic is easily deformable and at room temperature pretty stiff so it keeps its shape.
Before I settled on Polystyrene I did a quick test of different mirror-like materials:
Coated acrylic glass
Metallized polystyrene
PVC foil with an aluminium layer
and Rustoleum Mirror Spray on a PETG sheet
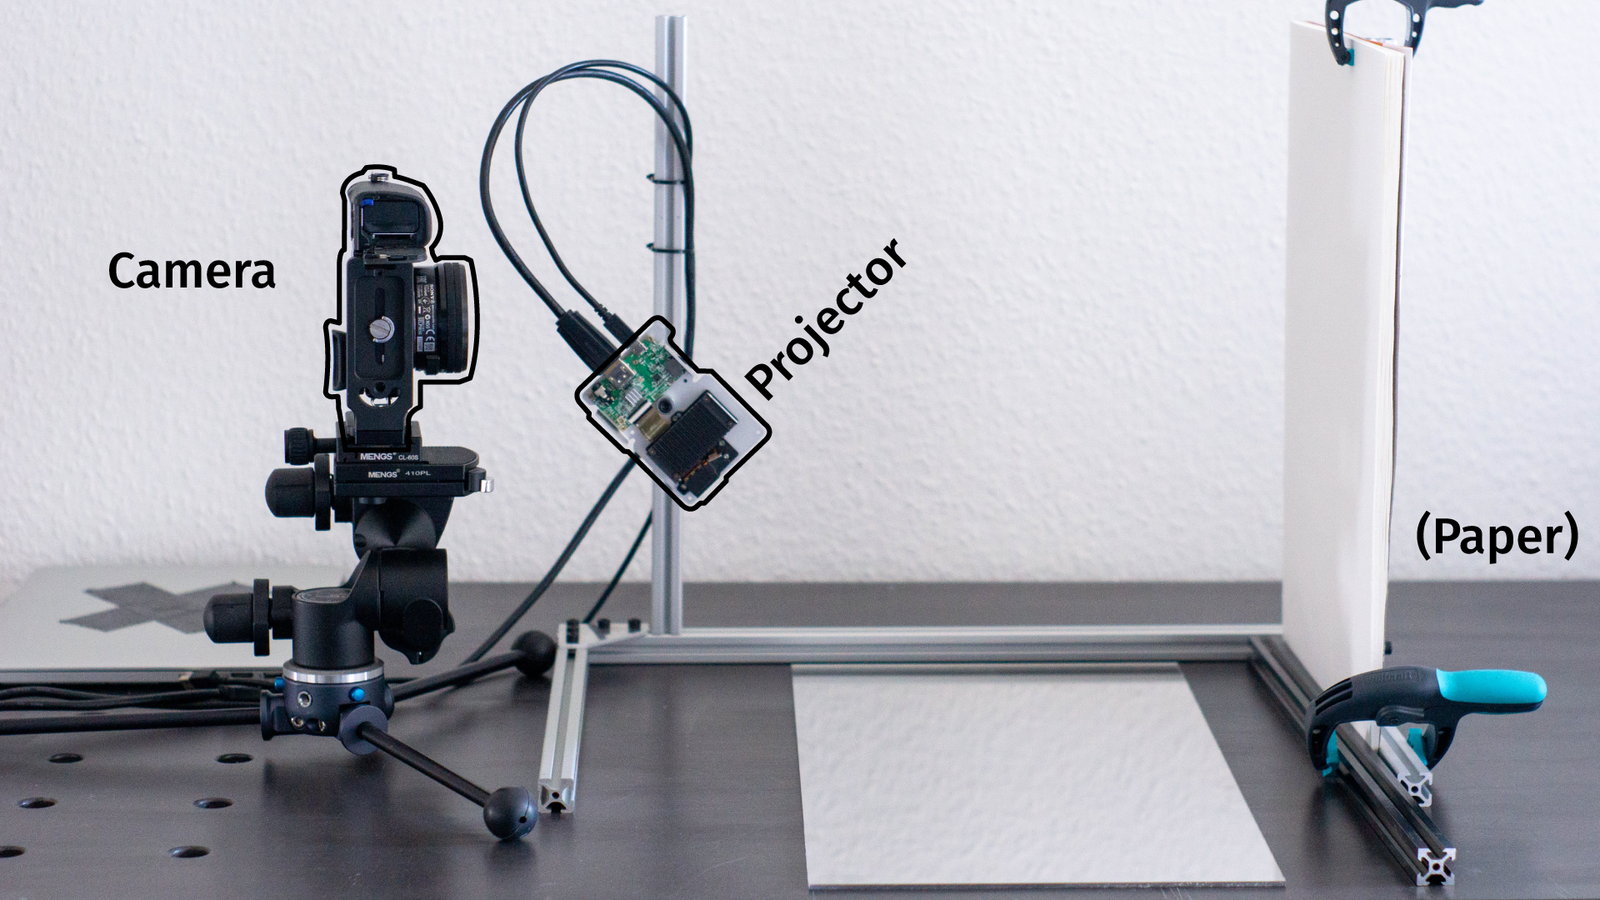
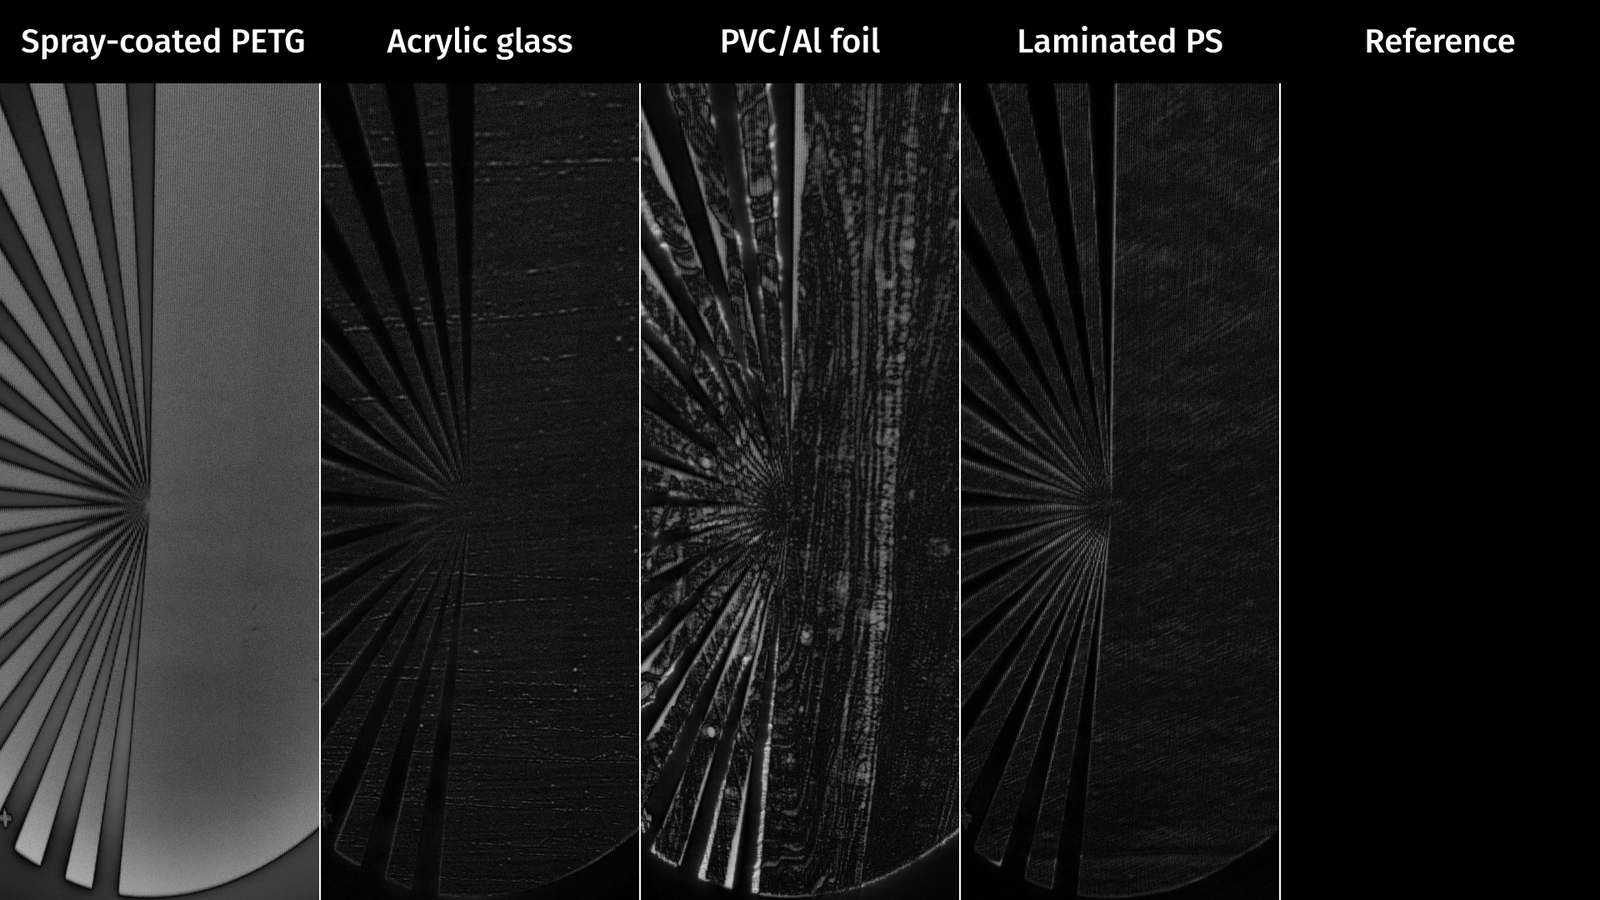
Comparing this works pretty easy by bouncing light against different mirror materials onto a sheet of paper.
My reference material is a silver-coated glass mirror, which is pretty standard stuff and the highest quality mirror you’ll find in your household.
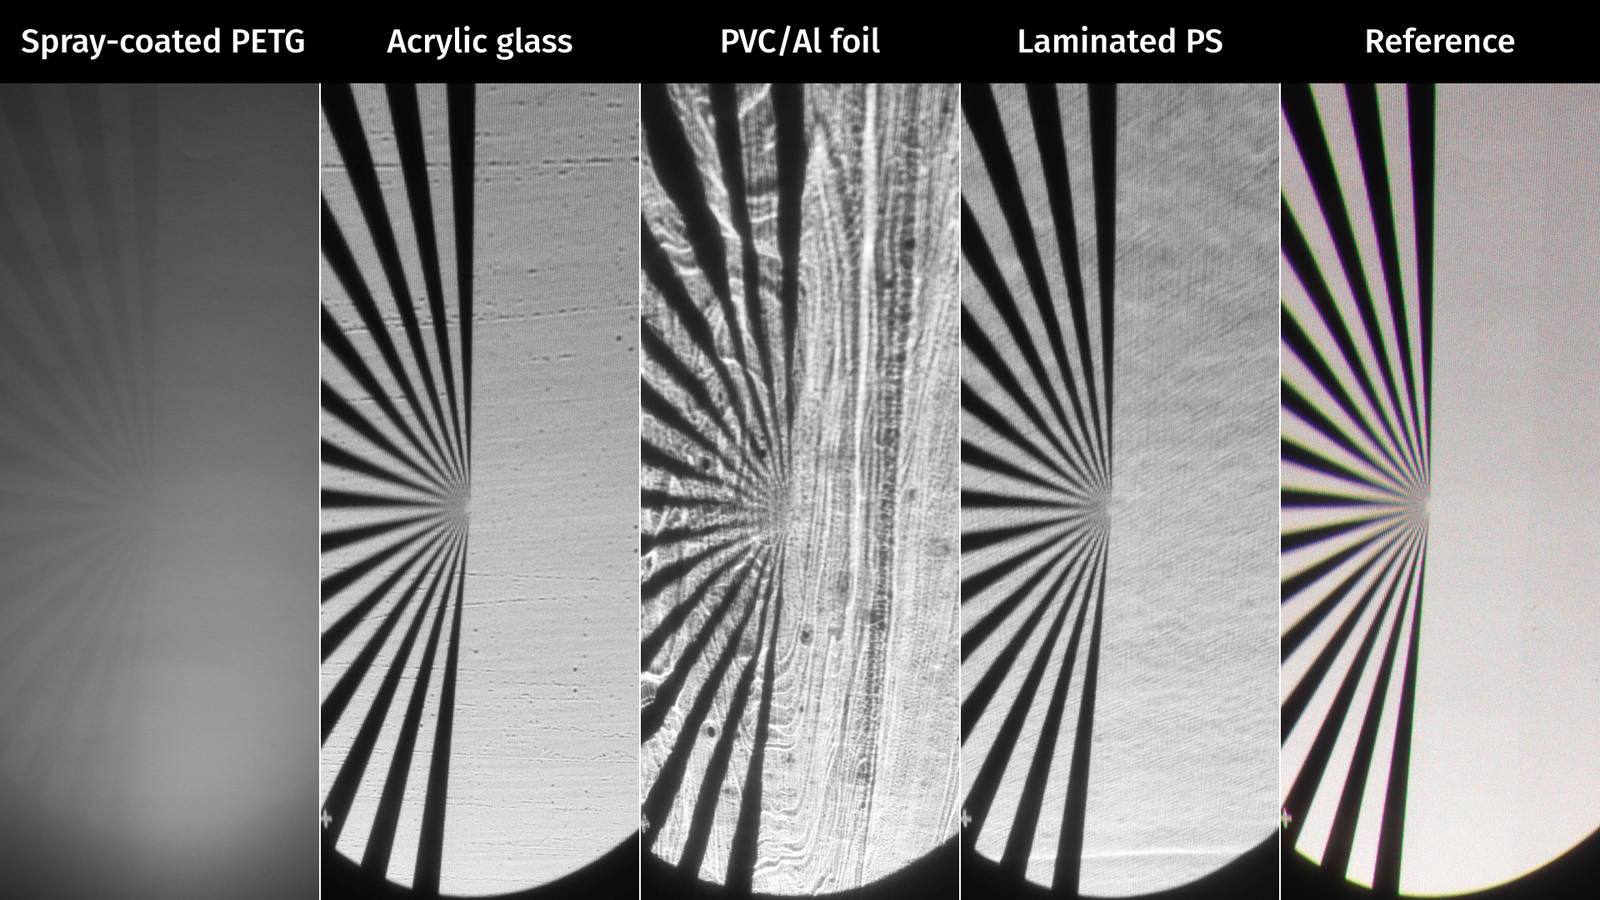
The reflection of the projected test pattern is already looking pretty good.
But if we subtract the image from the reference mirror, we just see the differences, so all the tiny imperfections and errors.
We can see that acrylic glass looks quite ok, but has a few tears or cracks in the reflection surface.
Laminated polystyrene causes a bit of color banding and has some issues, but these are well distributed among the whole surface and not as local as acrylic
PVC foil is just straight-up garbage and the mirror spray even worse.
So, we’ve got a winner. The laminated polystyrene is something you can usually get this at a half millimeter or 1 millimeter thickness pretty much everywhere around the world. Sometimes in small arts and crafts shops, sometimes online. One valid alternative is vinyl which may be easier to get in some countries. If you go thinner your mirror gets imprecise, if you go thicker you will have a hard time deforming the material.
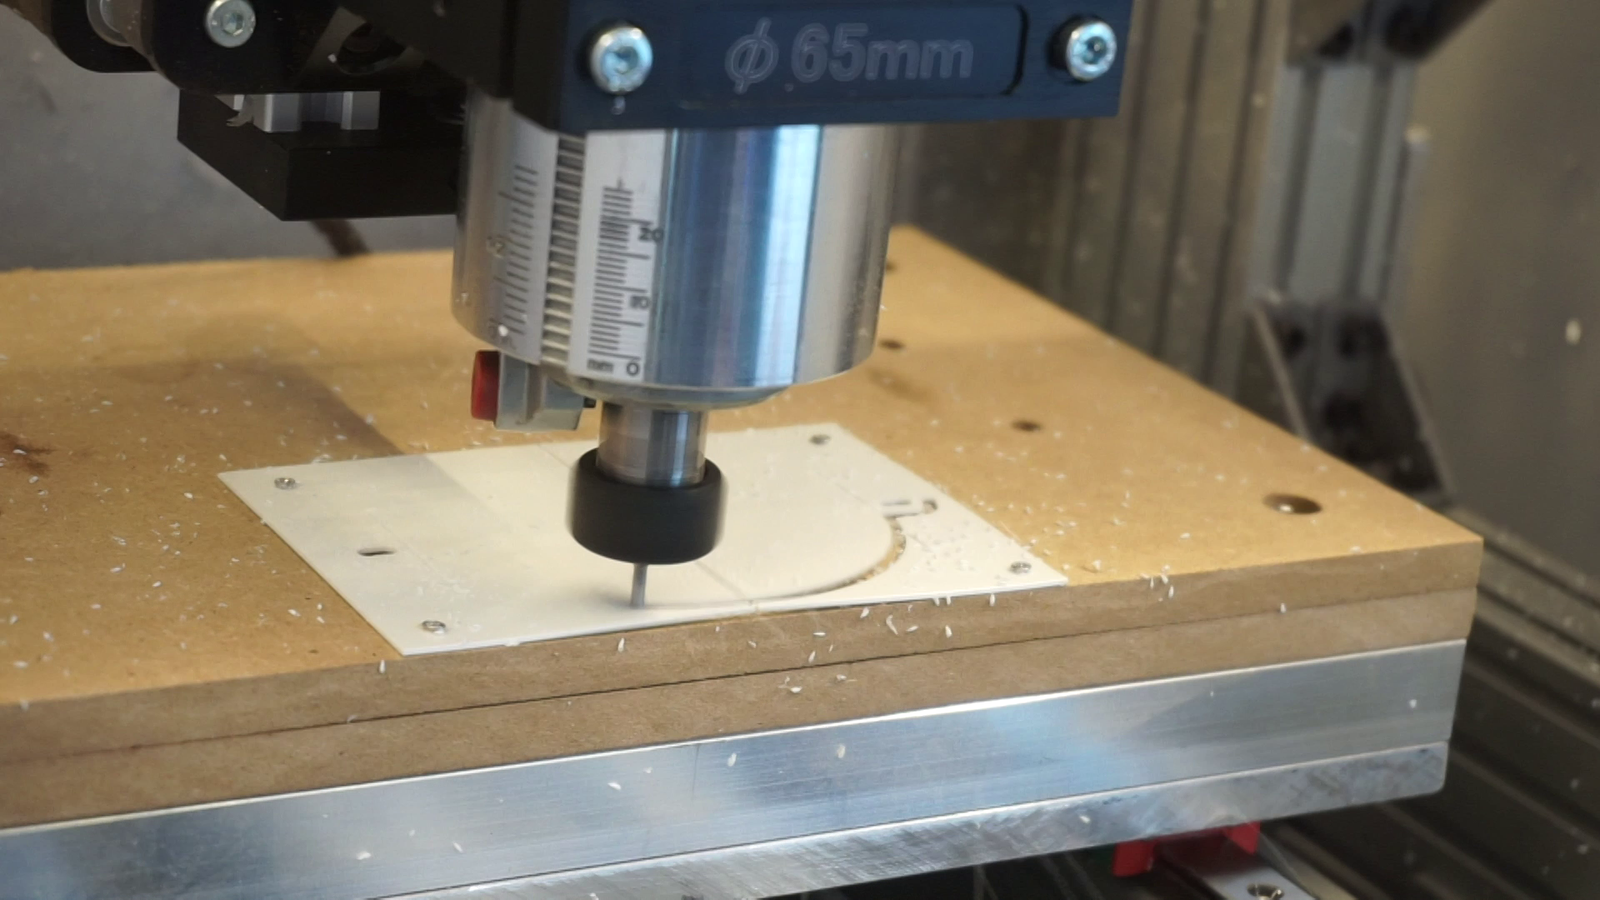
So, back to the mirror: You can model that in any CAD program and just pretend you are doing metal sheet bending with a 1mm thick material. When you’ve got your desired geometry, you can just export the drawing or generate CNC tool paths from the contours (that’s what I did).
With a simple CNC milling operation, I carve and cut the part from the polystyrene sheet. I can spare myself a lot of frustration by using a 90-degree chamfering endmill to pre-carve the bending lines. Less hassle, more precision. If you don’t have a CNC handy, print the drawing on a sheet of paper and cut it manually with a hobby knife. Works totally okay, but is slightly less cool, of course.
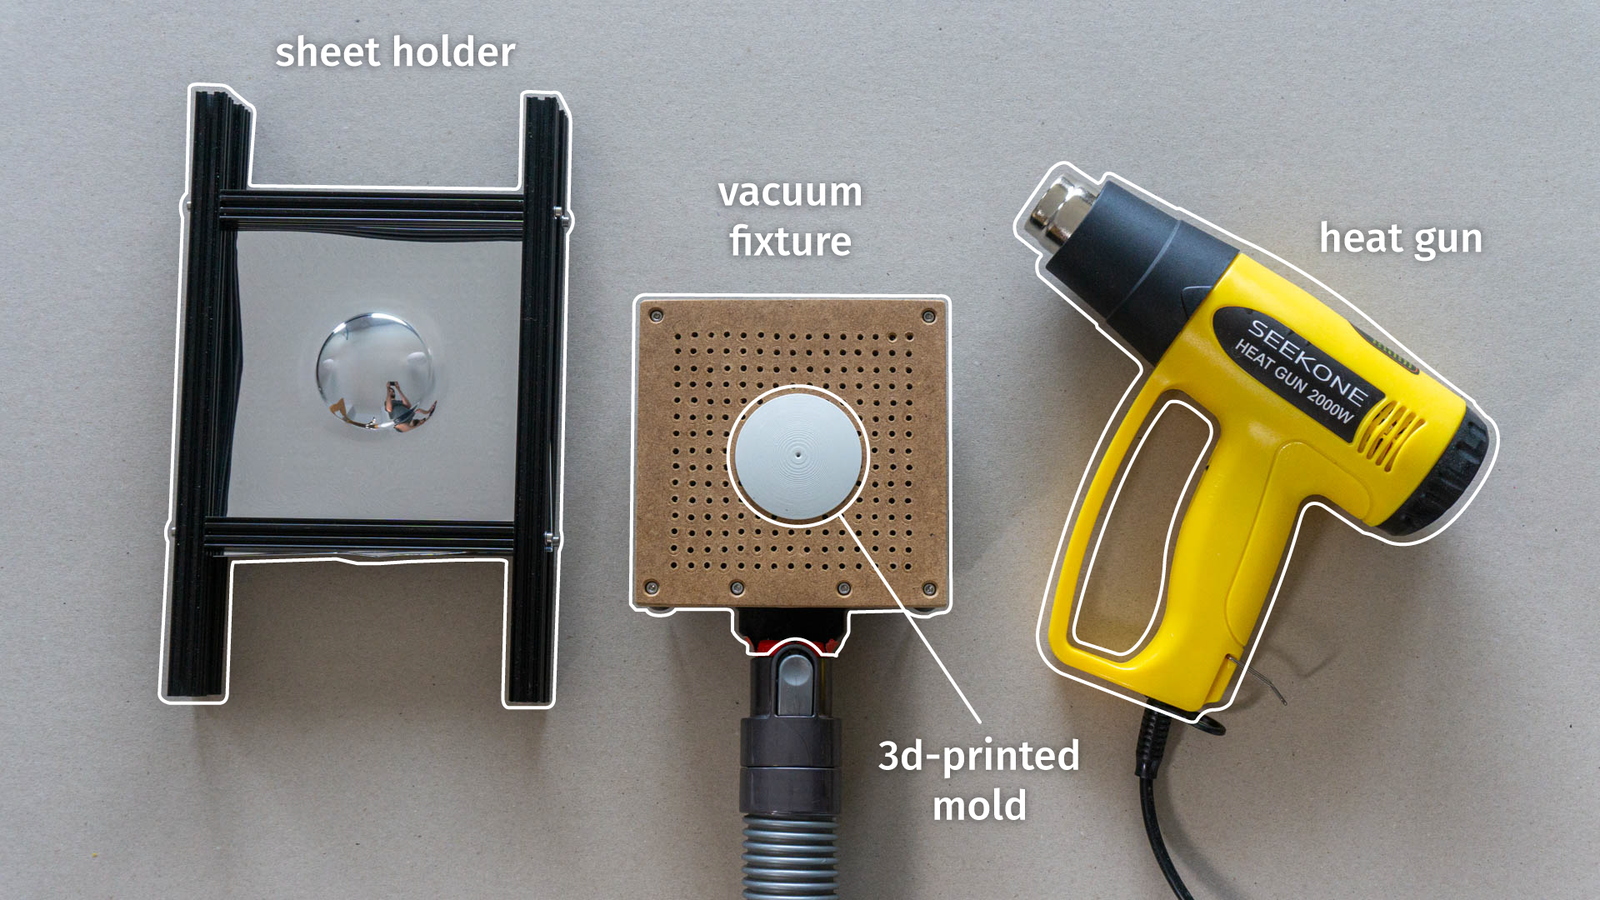
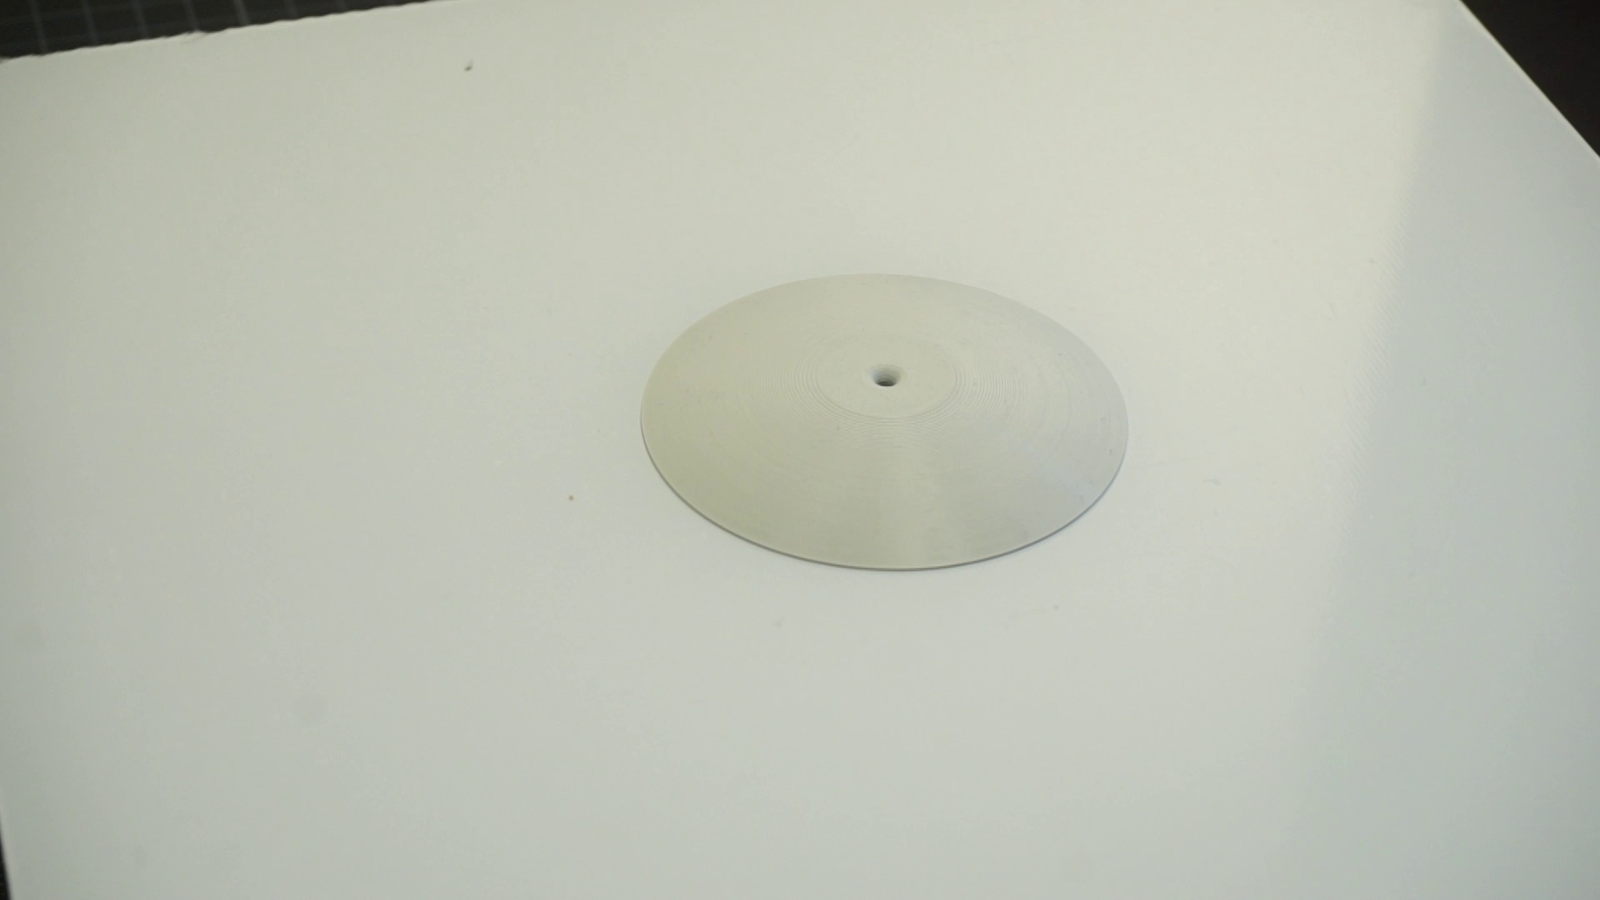
So, back to our mirror shapes. How can we make double-curved surfaces? First, we need to model something again and offset the surface by the thickness of the metallized plastic sheet. Then we can 3d-print the offsetted model as a mold for vacuum forming.
For vacuum forming you just need a few basic tools:
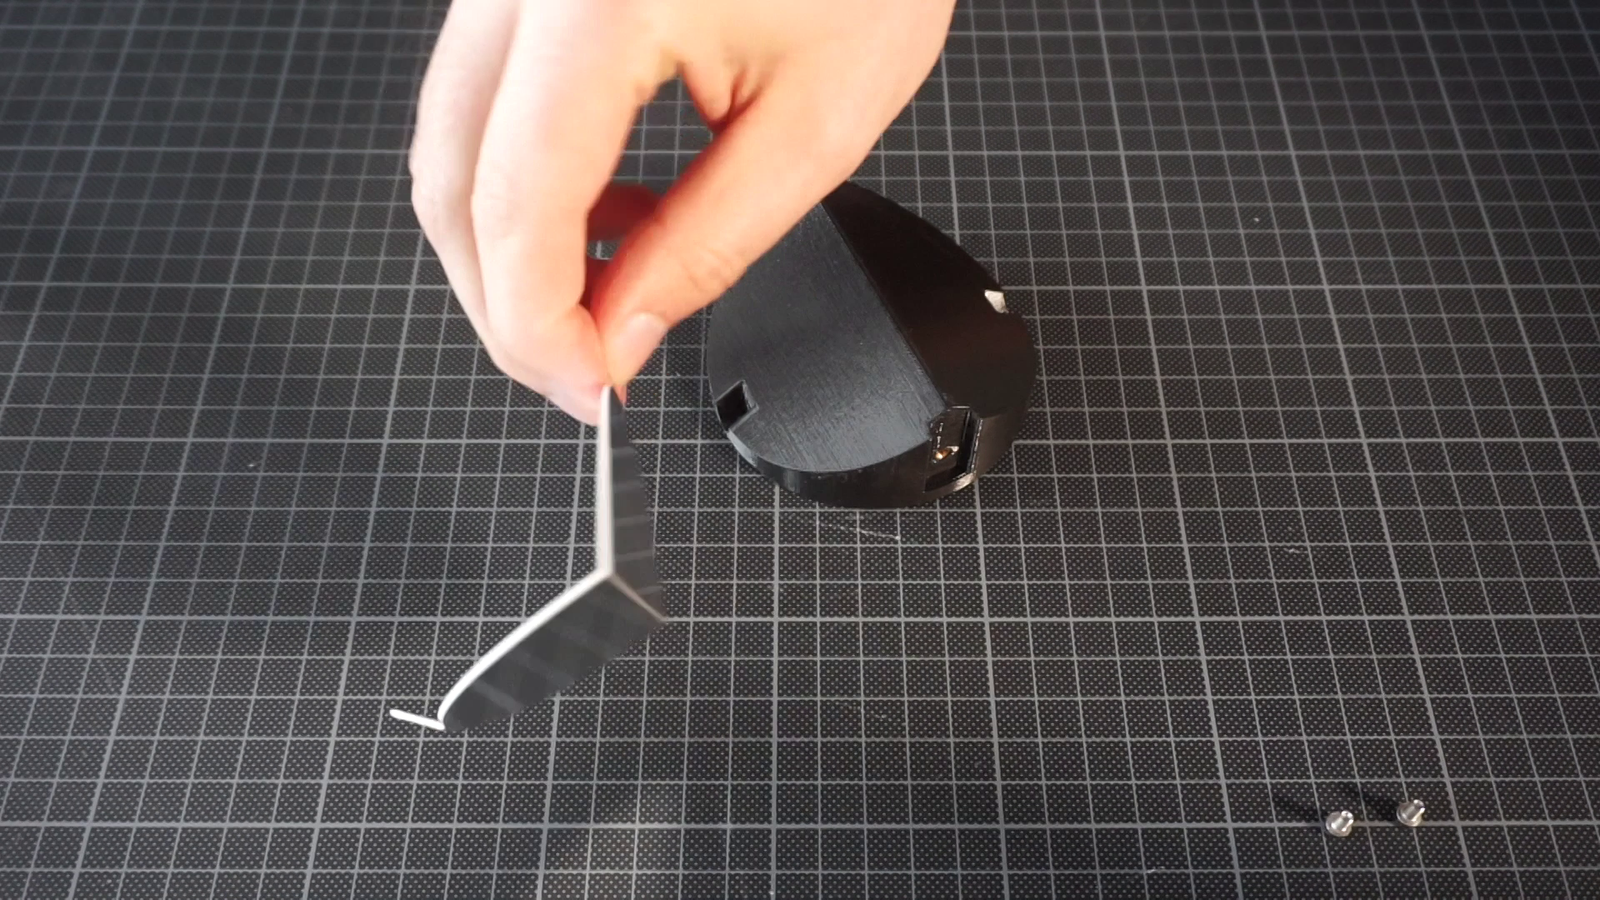
I am using slightly undersized screw holes in the mold, so I can drill a small hole in the mirror after vacuum forming to fit a screw and permanently fix the mirror to the plastic. Glue would probably do the job as well, but the screw holes make it easier for air to escape as well, so the vacuum forming is a bit easier.
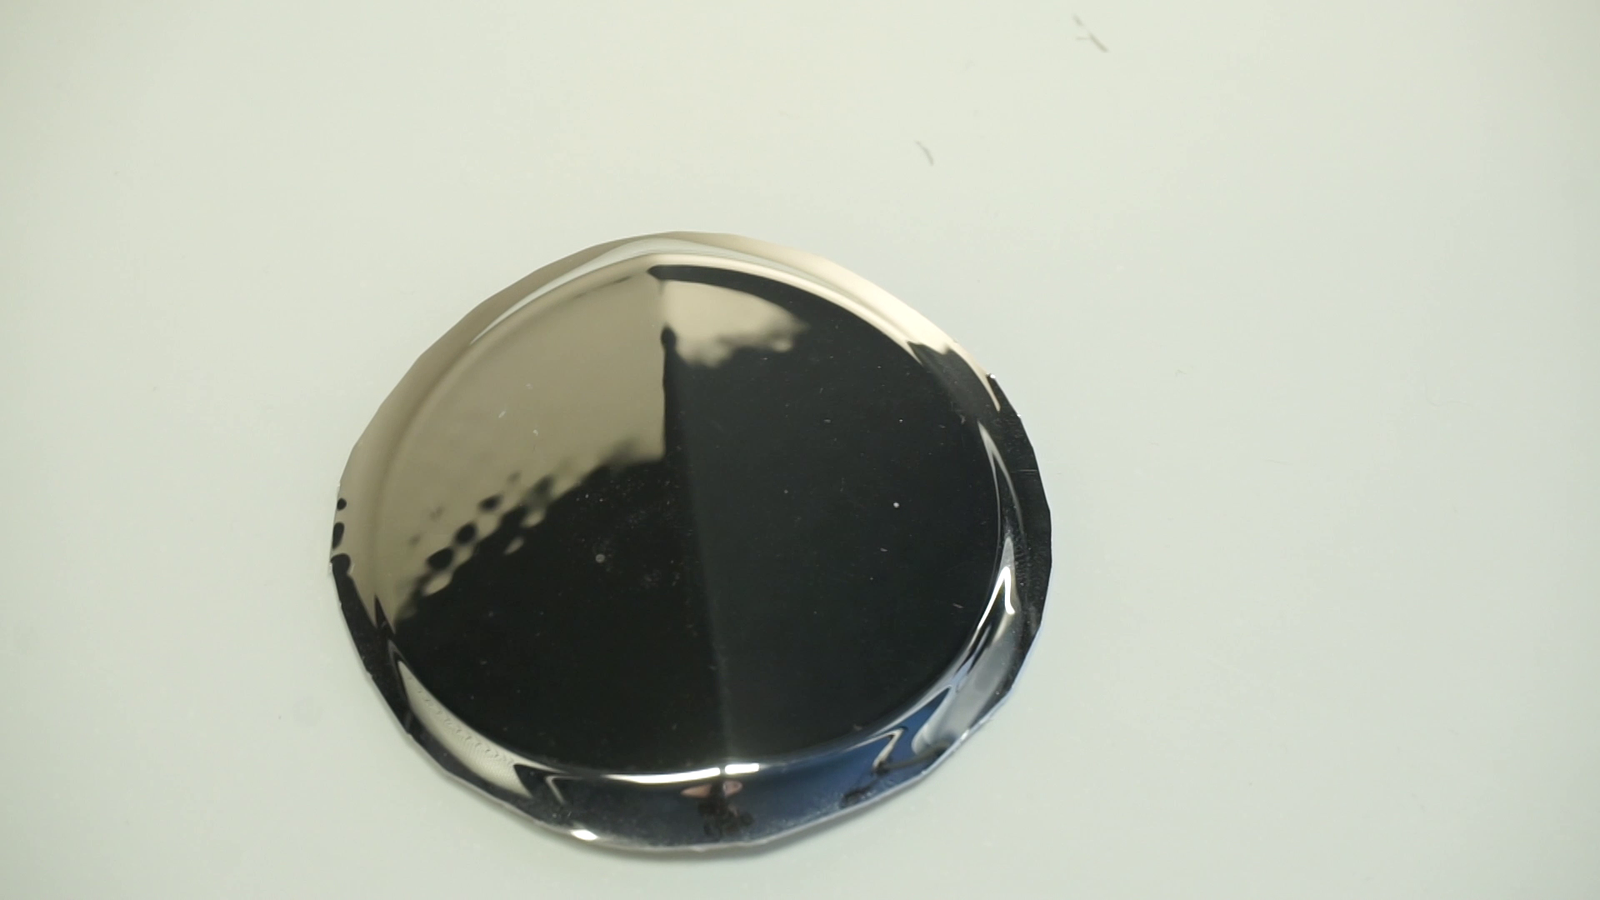
Then we just need to heat up the sheet of polystyrene, press it on the mold, turn on the vacuum and wait a few seconds till it’s hard again. Cut away the excess plastic and permanently bond the polystyrene to the mold.
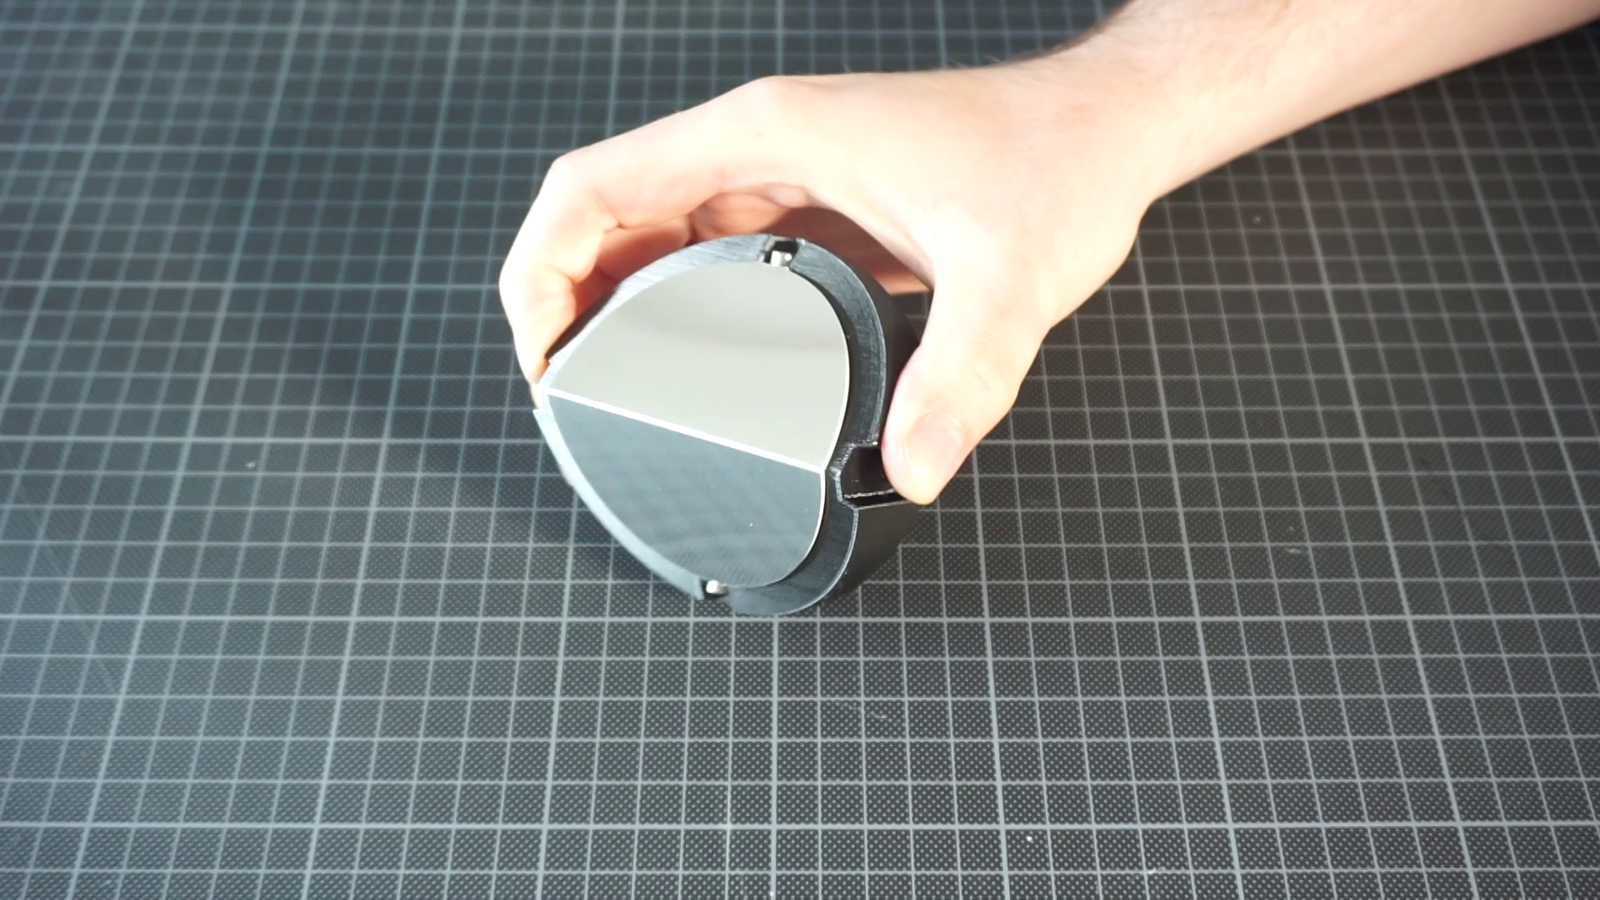
The resulting mirror is quite okay when it comes to precision, pretty good in terms of reflection, and extremely good concerning manufacturing time and price.
A few caveats:
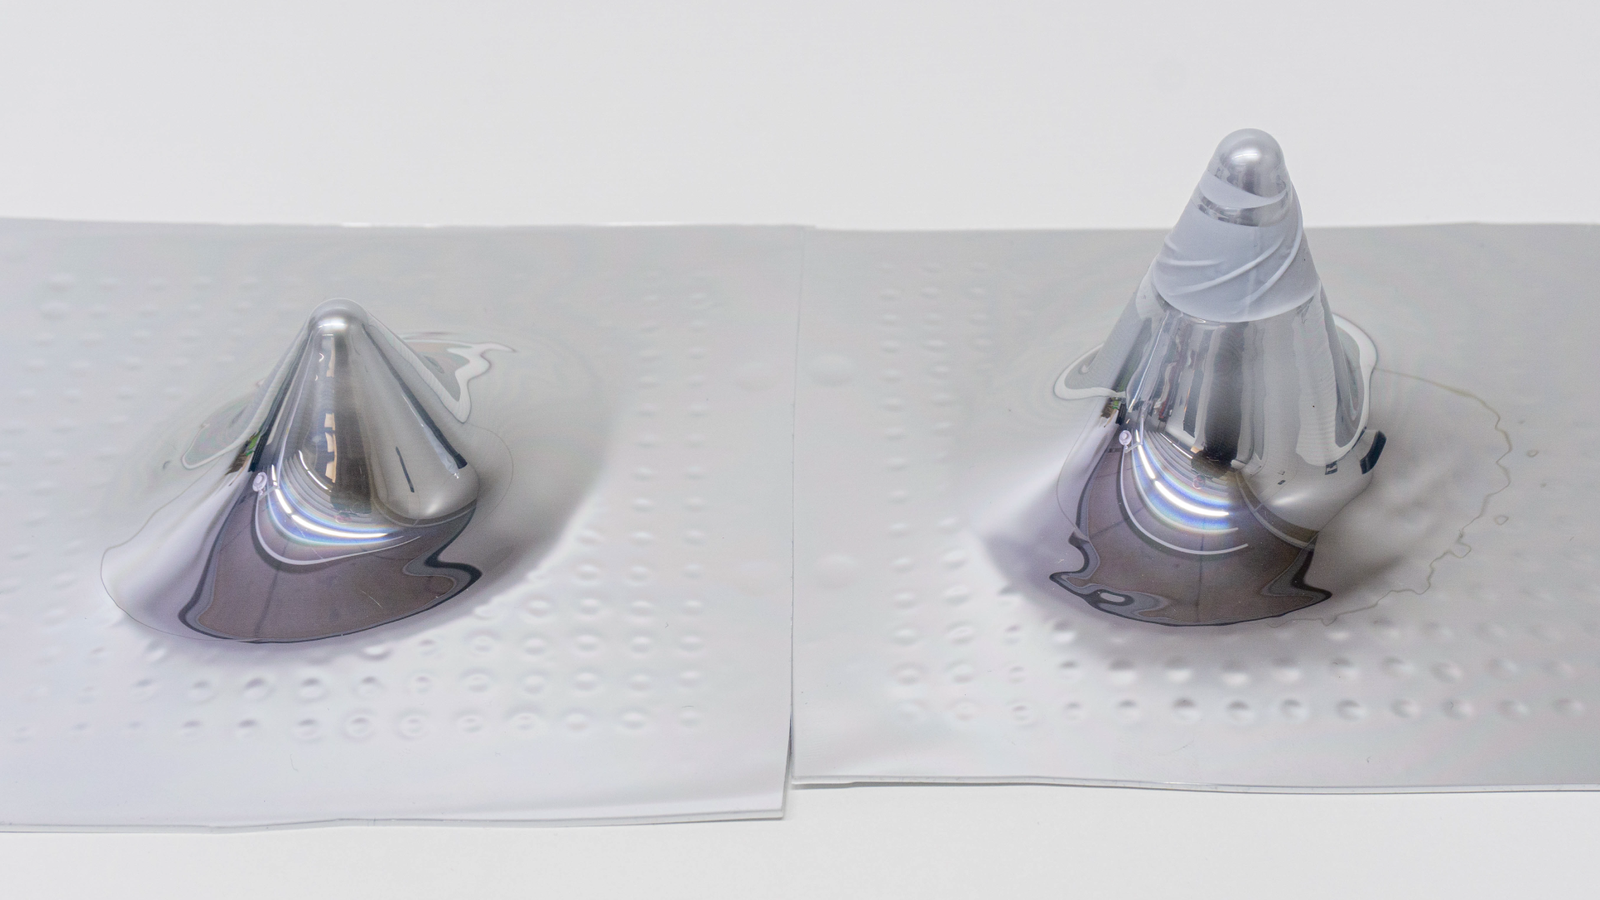
Do not use PLA! PETG works okayish with a few extra perimeters and anything that’s more heat tolerant works even better. In any case: If your plastic sheet transfers too much heat into the printed mold, it’s game over so do not overheat the sheet.
The metallized polystyrene can handle a bit of stretch but at some point it will rip. In most cases that’s probably not an issue.
Other videos which might be interesting:
Smoothing 3d-printed parts with resin and coat them chemically with silver.
A bit of theory and a lot of making mirors with glass blanks.
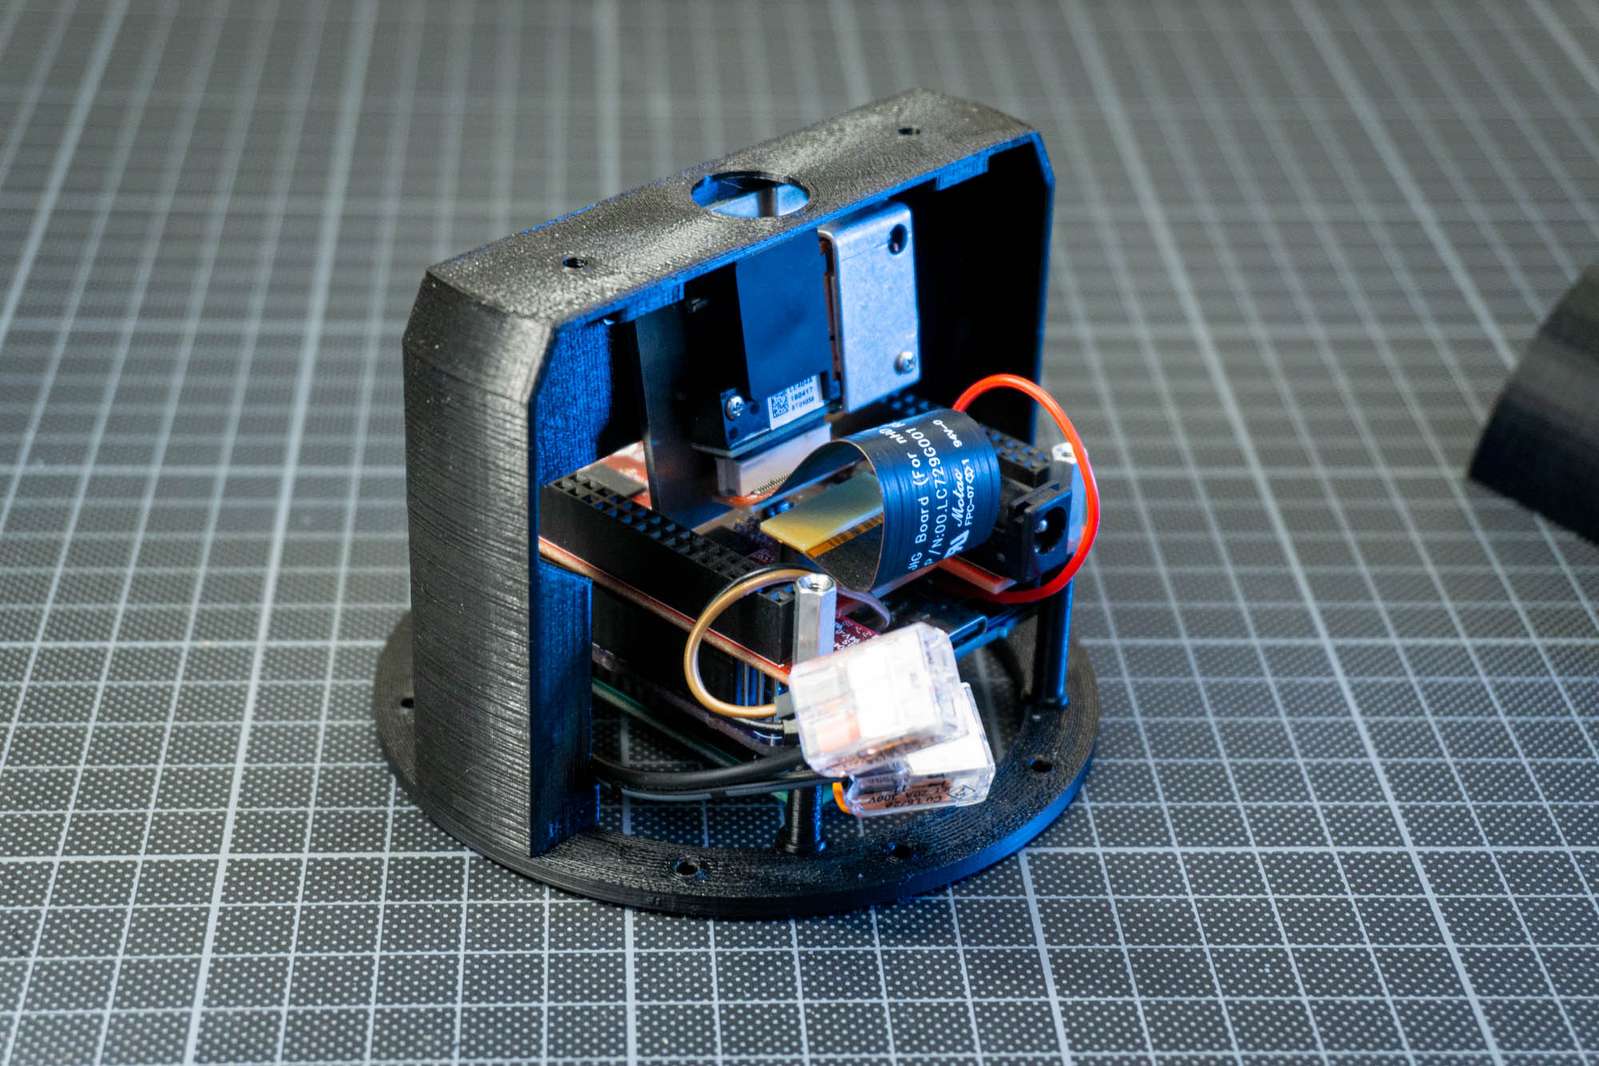
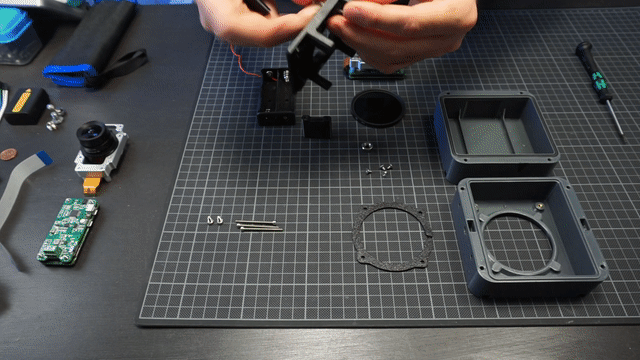
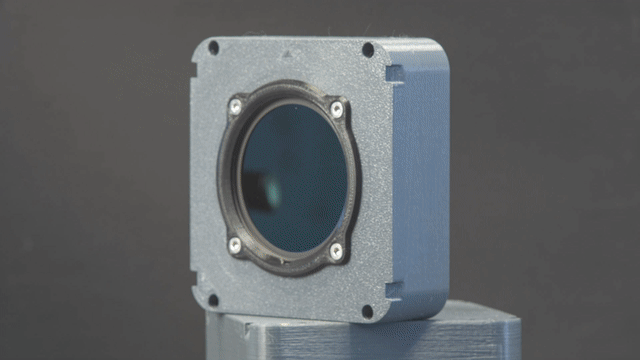
When building prototypes that require tiny projectors capable of projecting an okay-ish image over short to mid-sized distances, finding something decent is not easy. In my case I needed something that is as small as possible, has a wide field of view and should ideally be compatible with a small Raspberry Pi Zero.
Texas Instruments DLP LightCrafter Display 2000 EVM for BeagleBone Black
Thats an evaluation kit for the smallest of the TI “LightCrafter” projector units, meant to be used as a Beaglebone Black hat. Luckily with an adaptor PCB this can easily be adapted for a Raspberry Pi as well. The Raspberry Pis GPIO pins can be repurposed as a parallel display interface (DPI) to get the image data to the projector, so no HDMI is required.
Pinout and I2C commands to configure the projector interface can be found on the website of Frederick van den Bosch
Another very nice build that includes an adapter board made by MickMake can be found on MickMake’s website
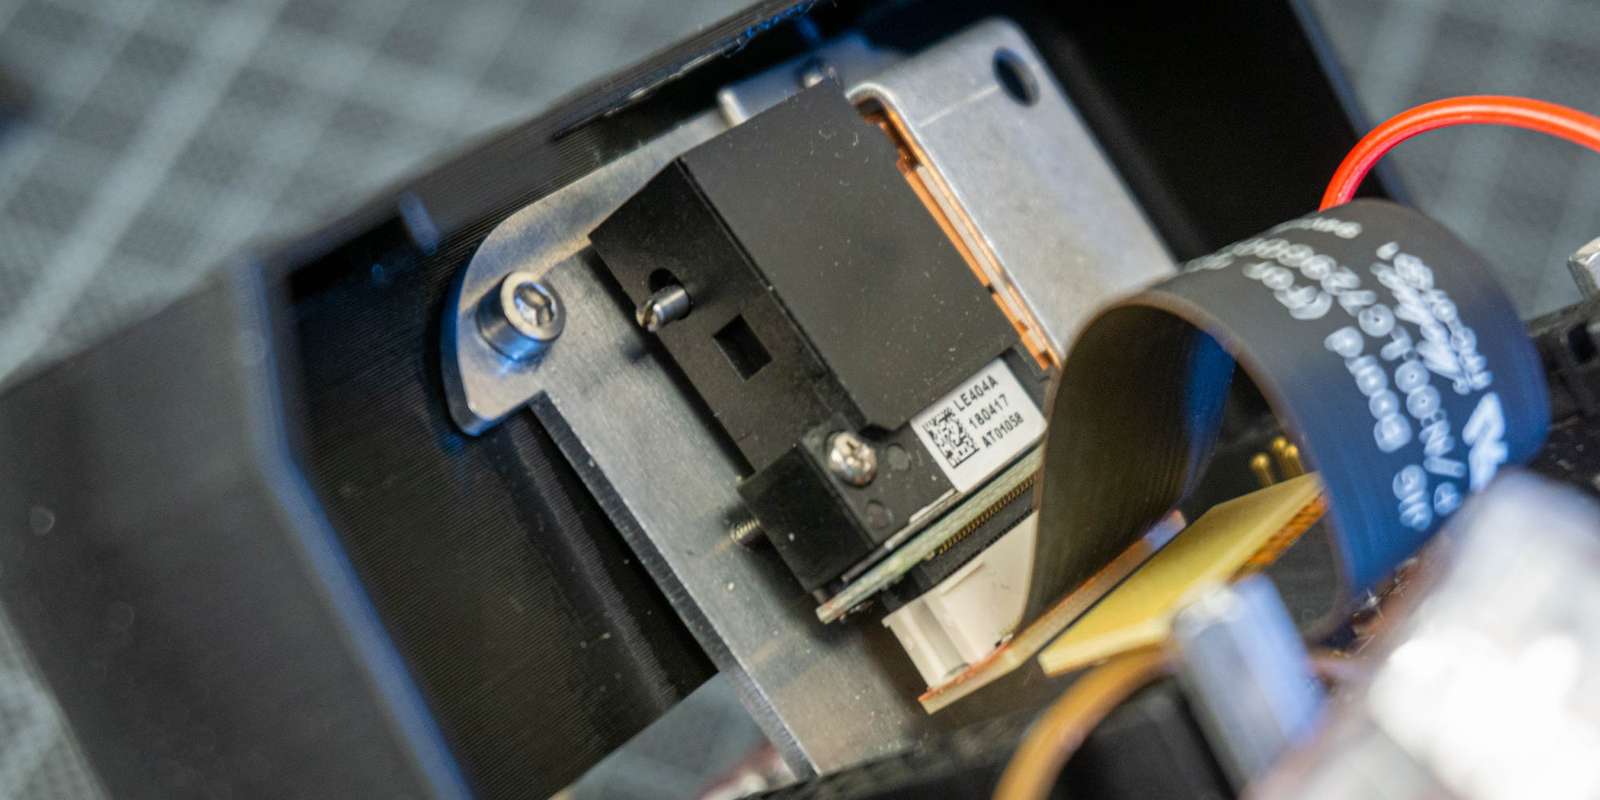
Keep in mind: we are talking here about a DLP projector, so manual adjustment of the focus plane is necessary.
This can be done with this ultra-unhandy tiny lever that moves a part of the optical assembly (there is no way to fix it in position).
A tiny laser projector, running at 1280x720 pixel. Full-sized HDMI input, requires 5V/1.5A via micro USB.
To save a lot of space, an HDMI-to-FFC adapter comes in handy, but may degrade the HDMI signal.
The tricky part is getting the HDMI settings right:
In ‘boot/config.txt’ the HDMI modes can be set. The Ultimems chipset supports (among others):
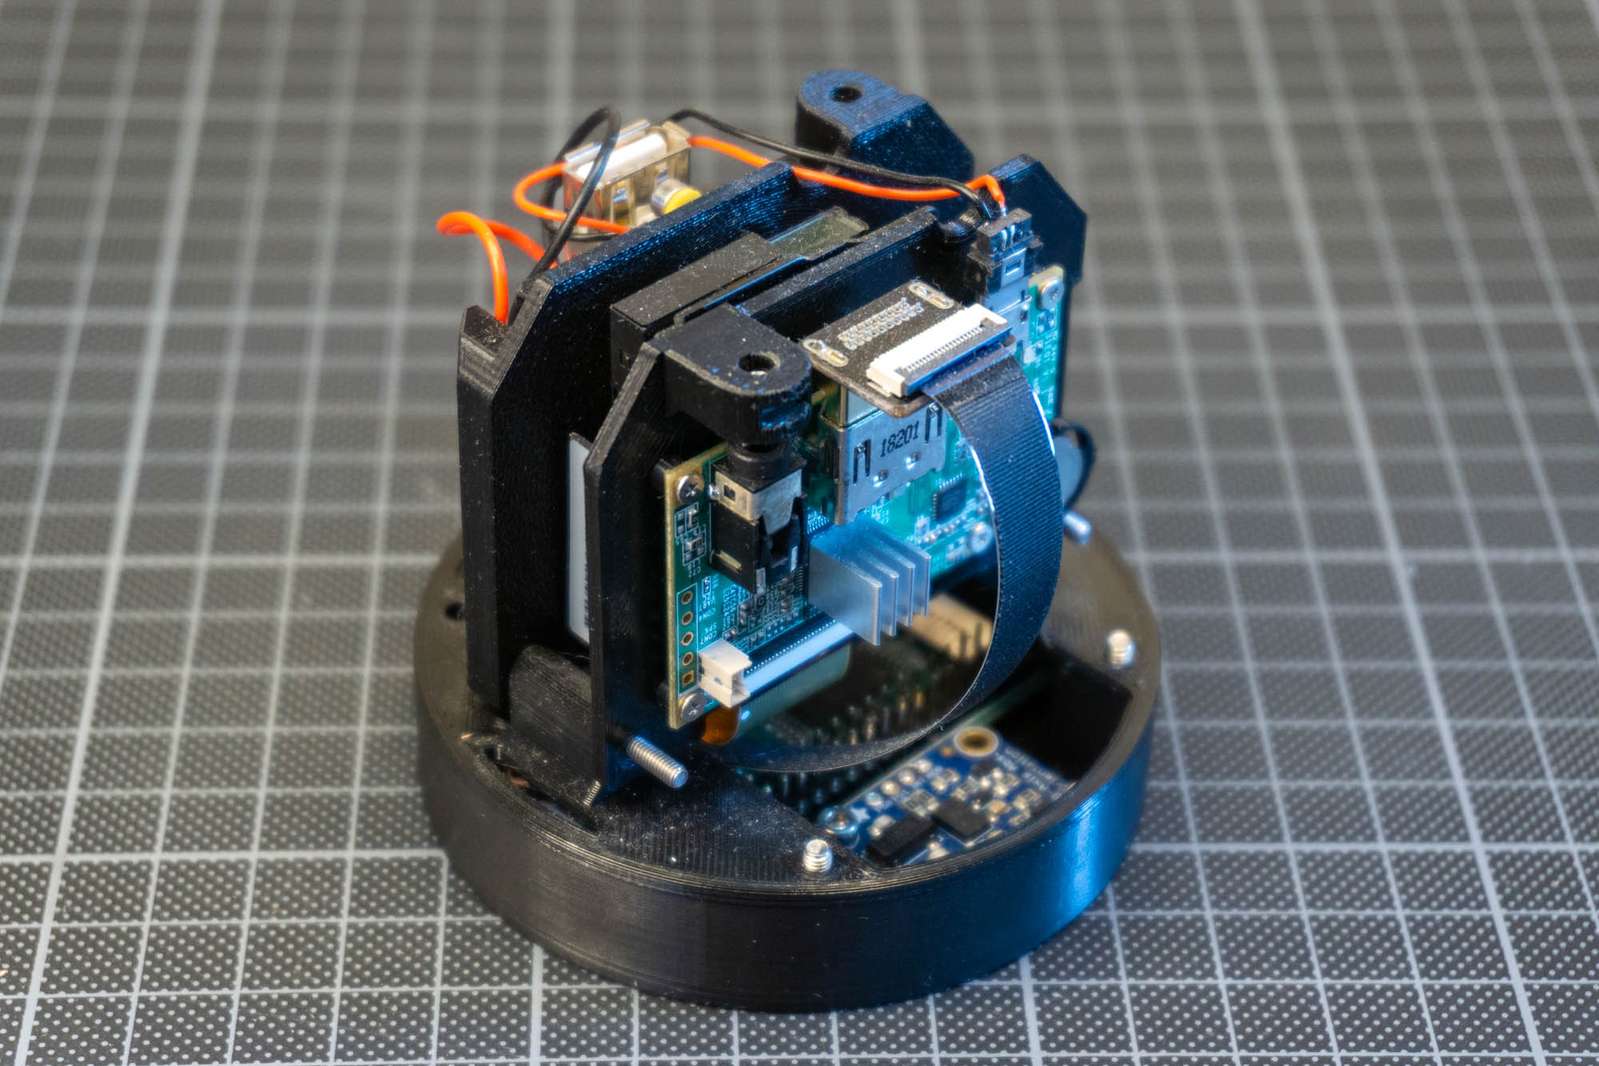
One nice advantage of having separate modules for projector and control stage is to be able to just fold it for a close fit (removing the projector stage with the TI LightCrafter 2000 EVM is a pain since the cable is connecting cable is quite stiff).
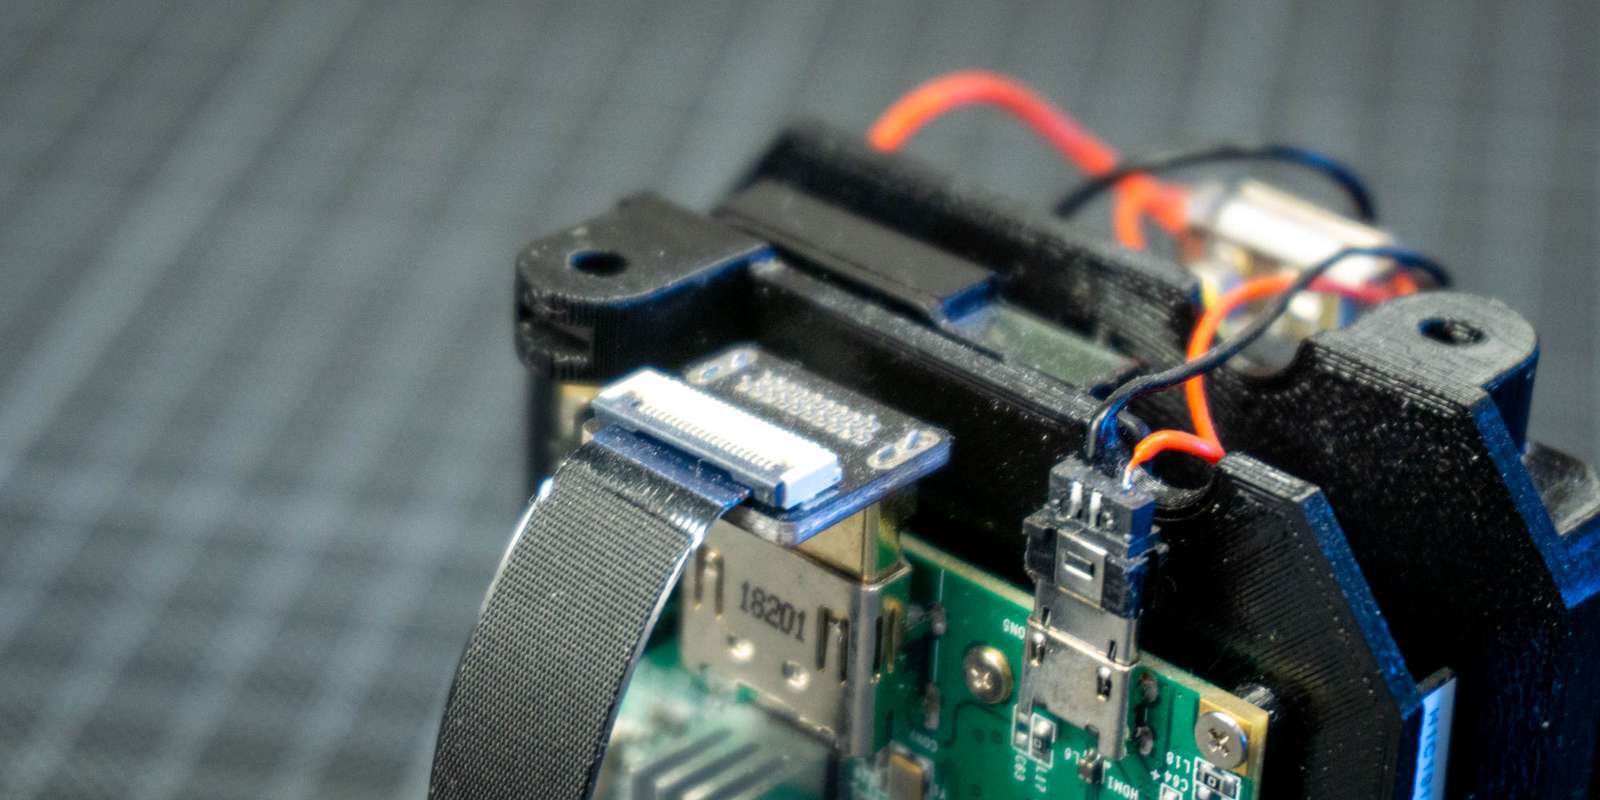
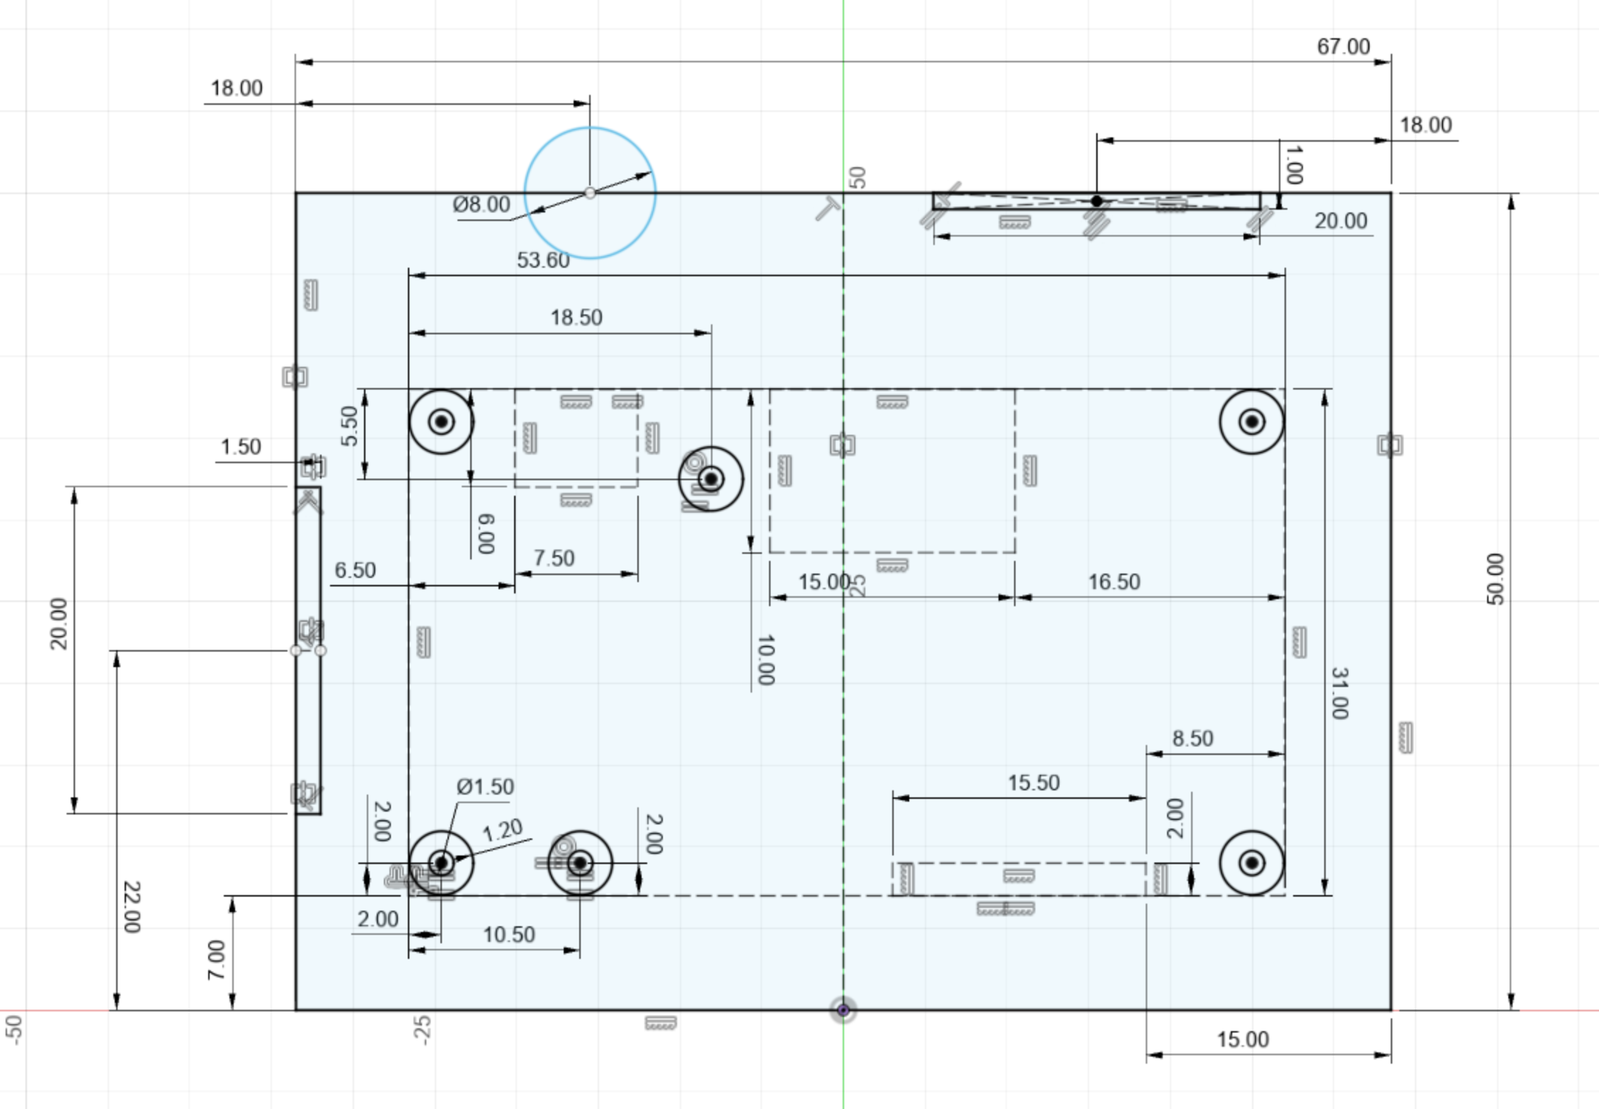
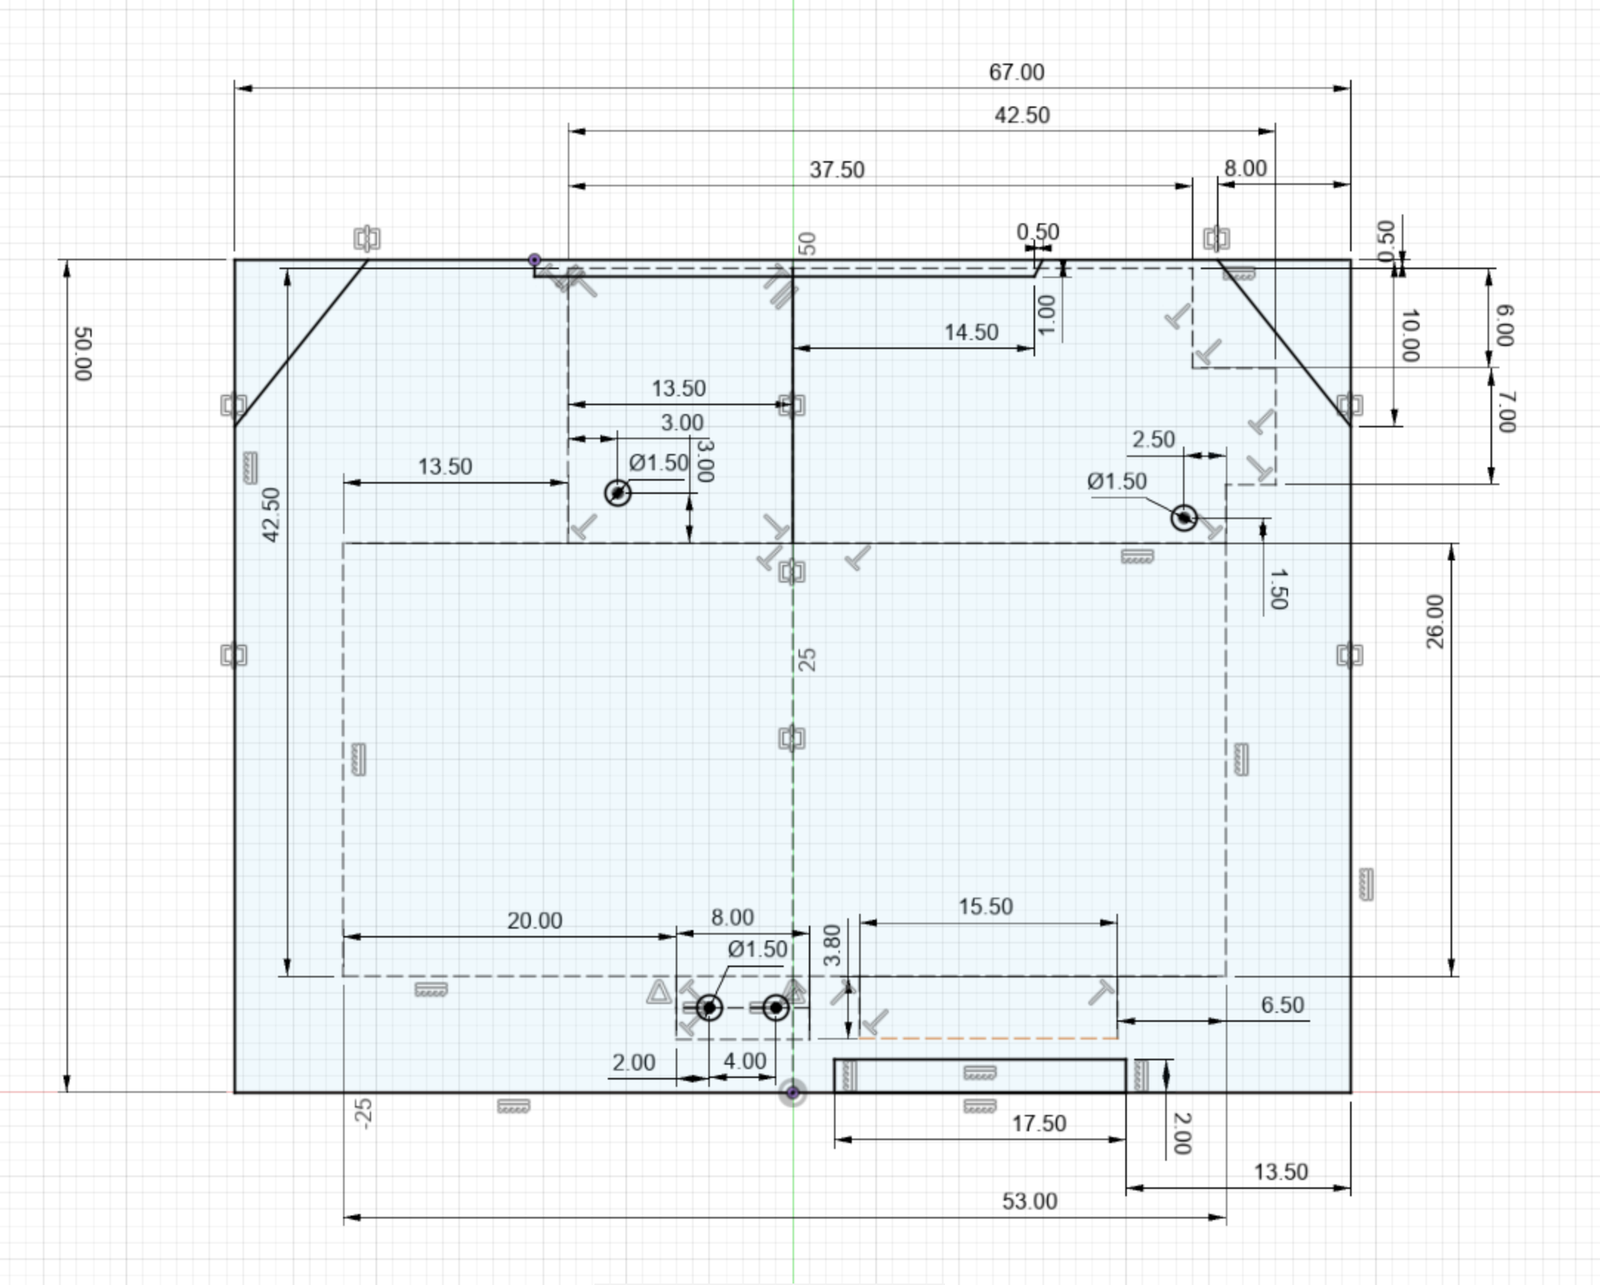
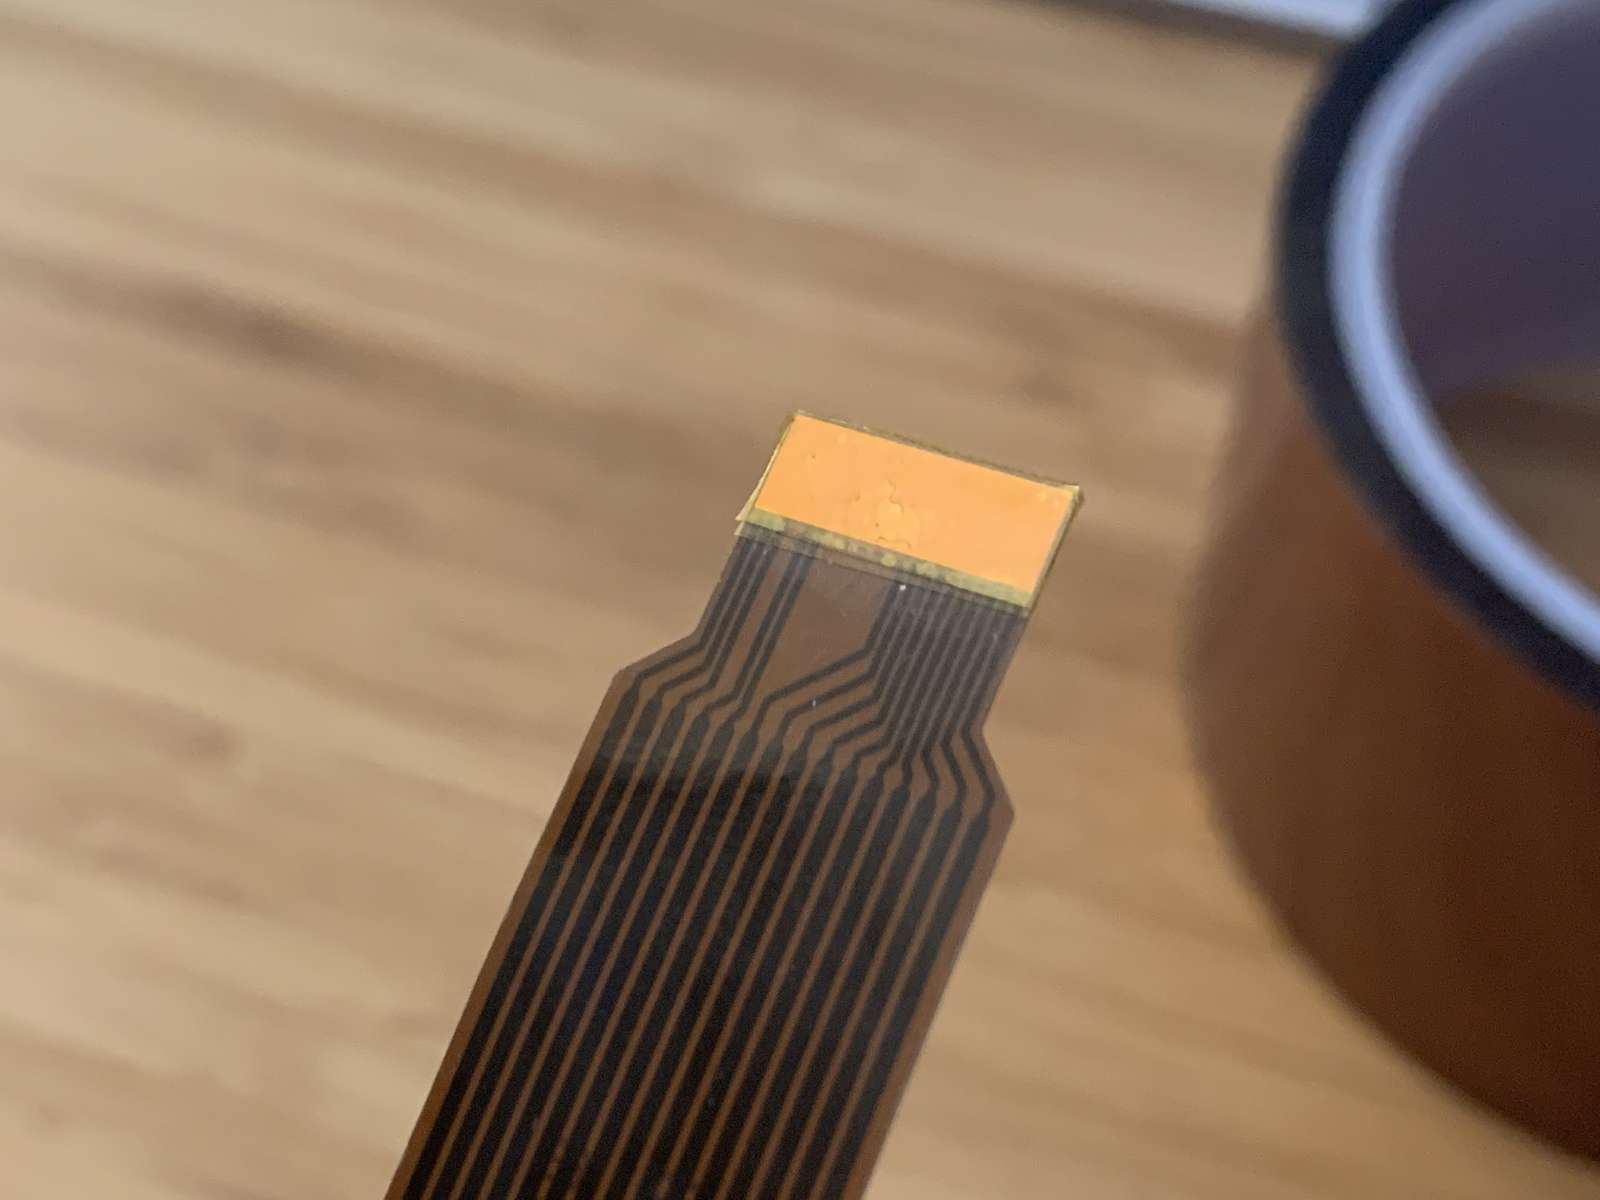
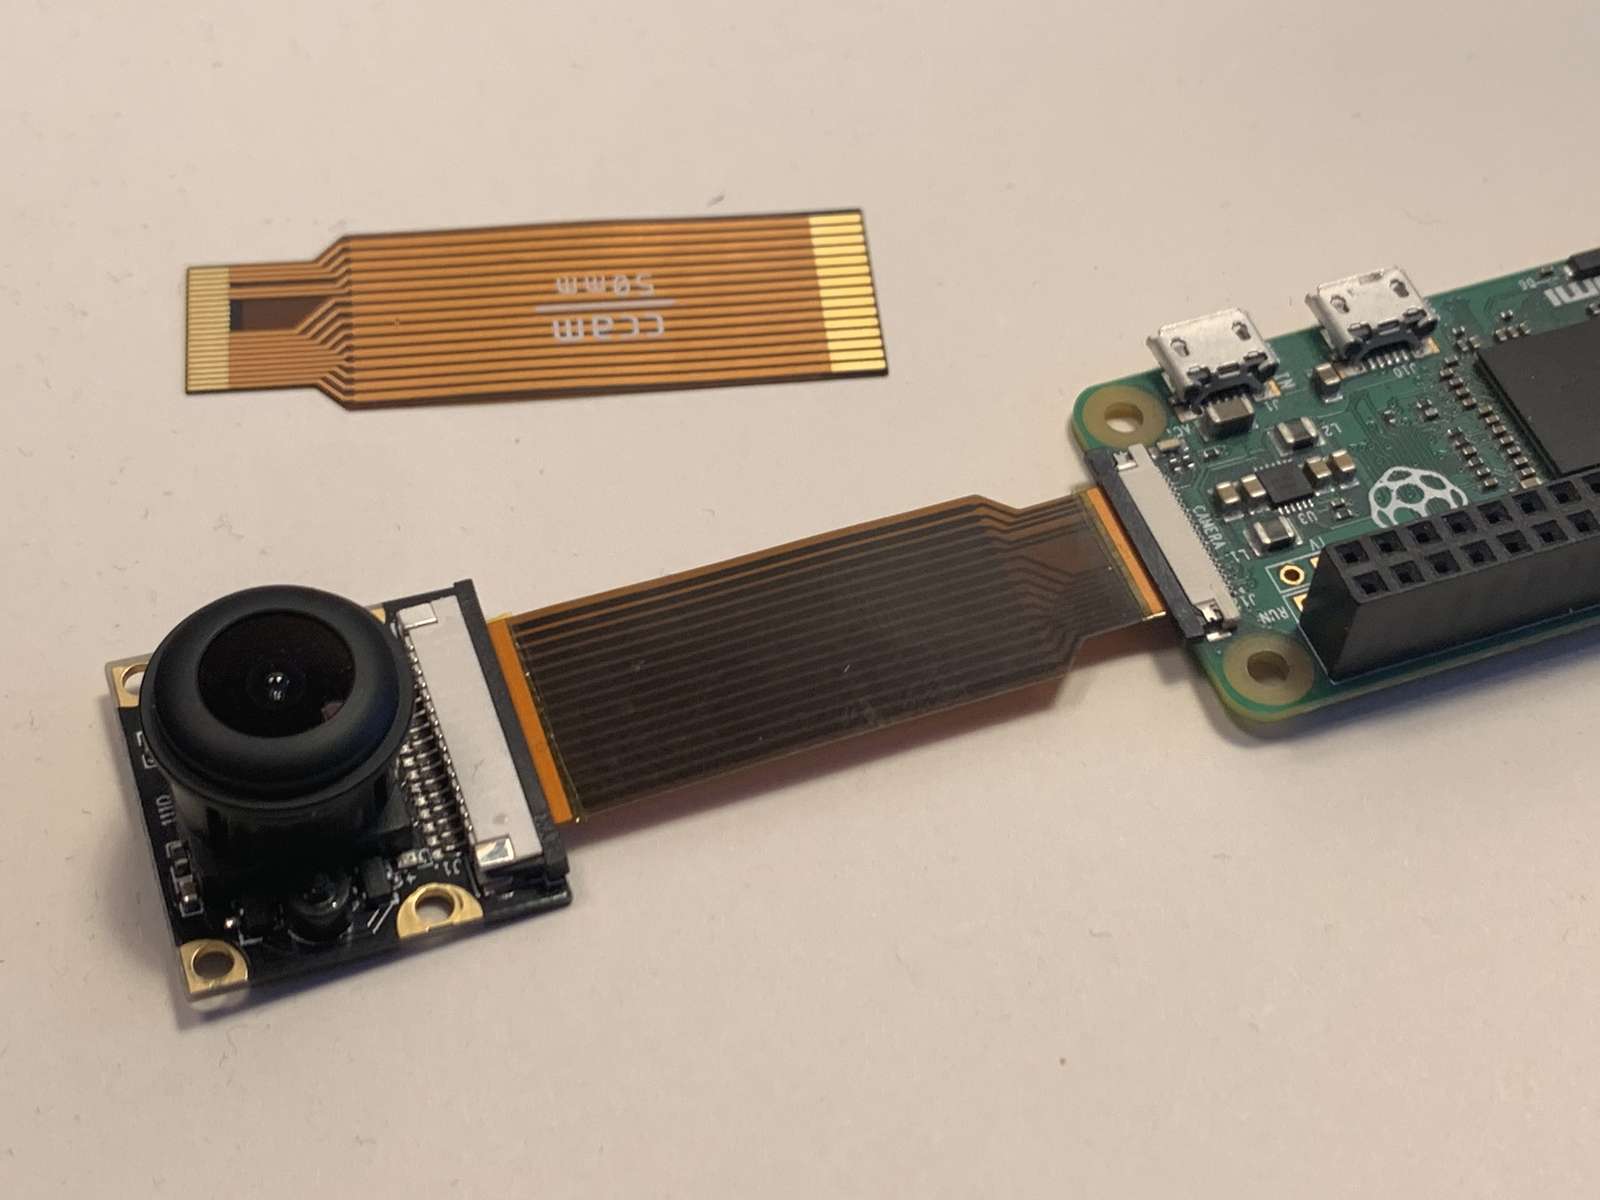
Sometimes one just needs a custom flat flex cable. In my case this was a Raspberry Pi Zero camera cable. A quick search told me that flex PCBs have fancy stuff like polyamide stiffeners to make certain parts more … stiff (obviously). This increases the PCBs thickness slightly so connectors are chosen to accomodate that.
Flex PCBs are apparently really expensive. Not so much the per-unit price but the base price. PCBway charges about a hundred USD minimum. That’s slightly too expensive for my little test project.
Luckily OSHpark is offering a flex PCB service as well at 10 USD per square inch, exactly twice as expensive as their regular PCBs. Sadly, OSHpark flex PCBs come without stiffeners. Luckily, … I came across this handy tweet.
Add a copper area on the backside of the connector part and you’re good. Except that the ZIF connectors used for Pi cameras require 0.3mm thickness.
What worked for me well was adding two layers of Kapton tape (which is basically the same group of chemical compounds as polyamide) and trim the excess with a pair of sharp scissors.


 CC BY NC -
  CC BY NC ND -
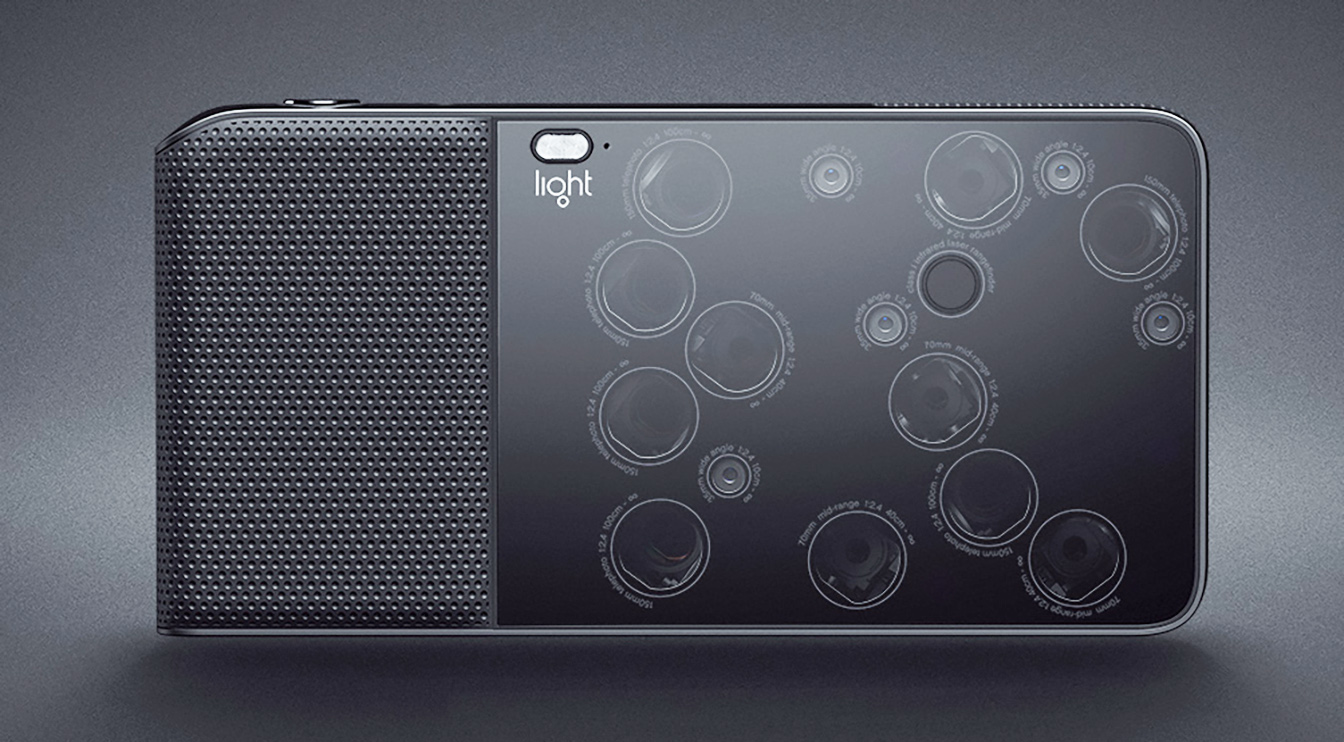

