Recycling Disposable Cameras for Toy Lenses
25 May 2023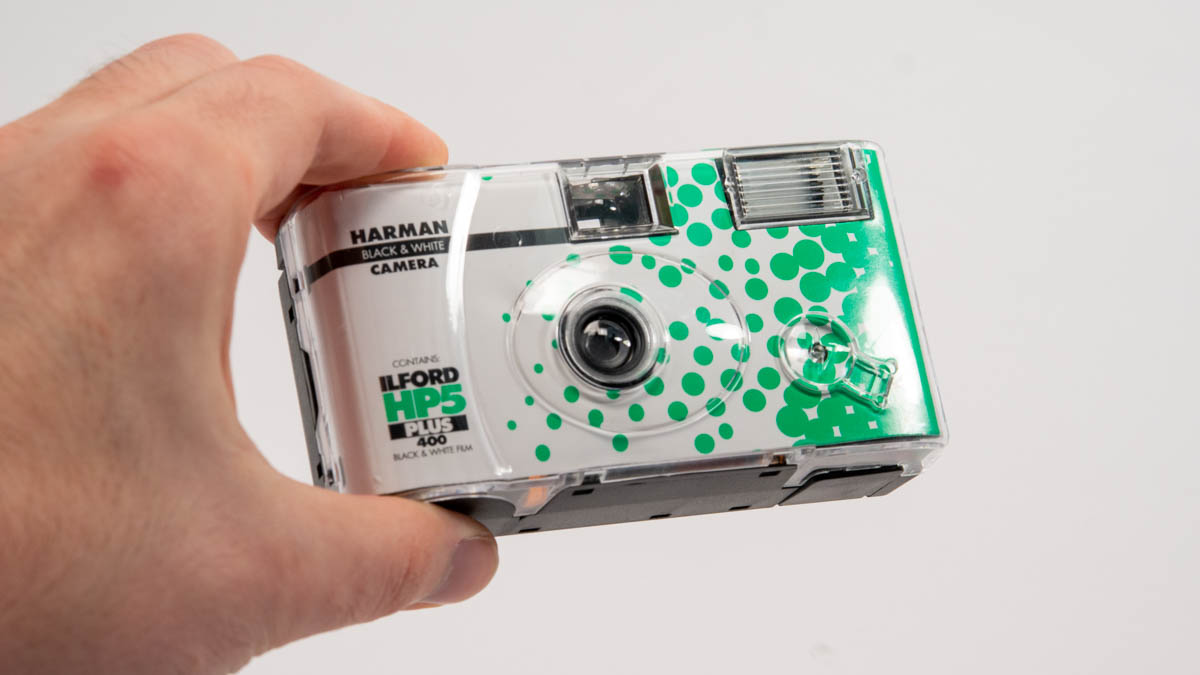
No matter your age, I guess you have seen or used one of these disposable film cameras. They’re easy, they’re cheap and they can be a lot of fun.
Despite being a rather despicable waste of resources, it’s really fascinating how simple and cheap these can be mass manufactured.
I’ve disassembled one for my video on viewfinder types, because yes, they come with their own funny little reverse Galilean viewfinder.
But there is something else rather fascinating about them: most of these disposables have only a single piece of plastic as a lens.
So, I wanted to know how bad is that actually and how can I reuse it for a digital camera lens?
Step 1: Disassembly
Some people send the whole camera to the lab for development. Apparently, some of these cameras are then passed on to the manufacturer for reuse or recycling.
https://www.fujifilm.com/us/en/about/region/sustainability/recycling
To which degree this can be taken at face value is disputable. At least in the 90s Fujifilm had a facility for disassembly and claimed to re-use at least some of the circuit boards, lenses, and mechanics. The outer shell got ground into raw materials. If that factory is still running with a lot fewer cameras around today, … who knows.
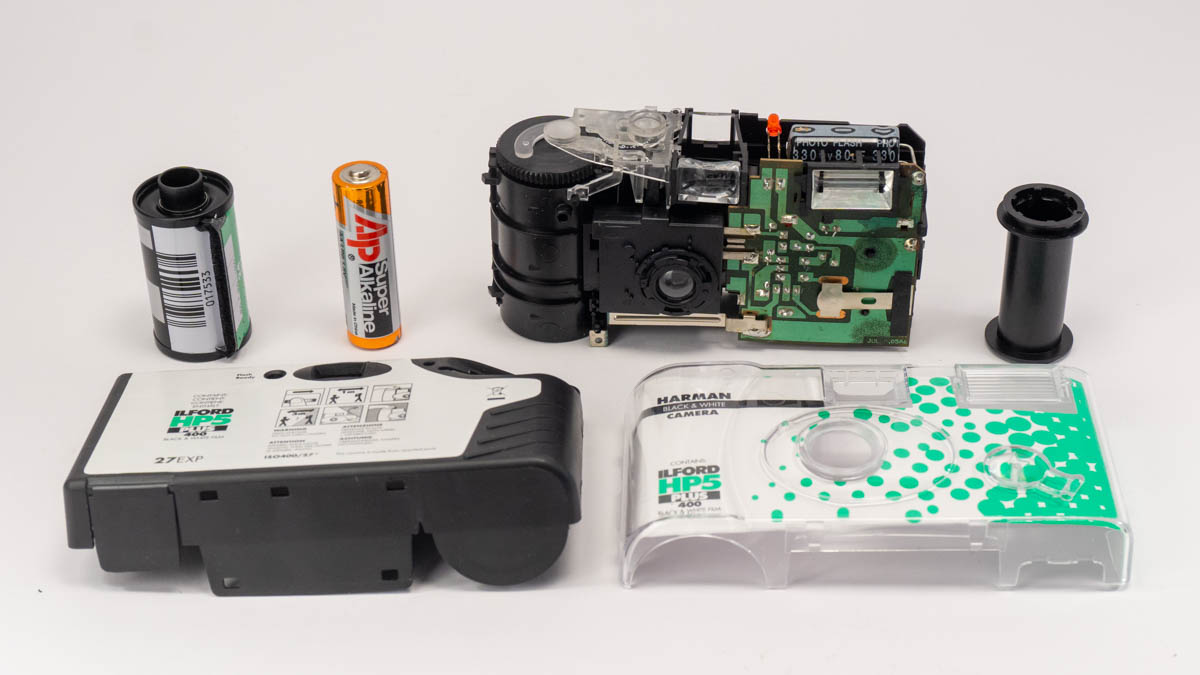
If you want to keep the body, you just need to open the body.
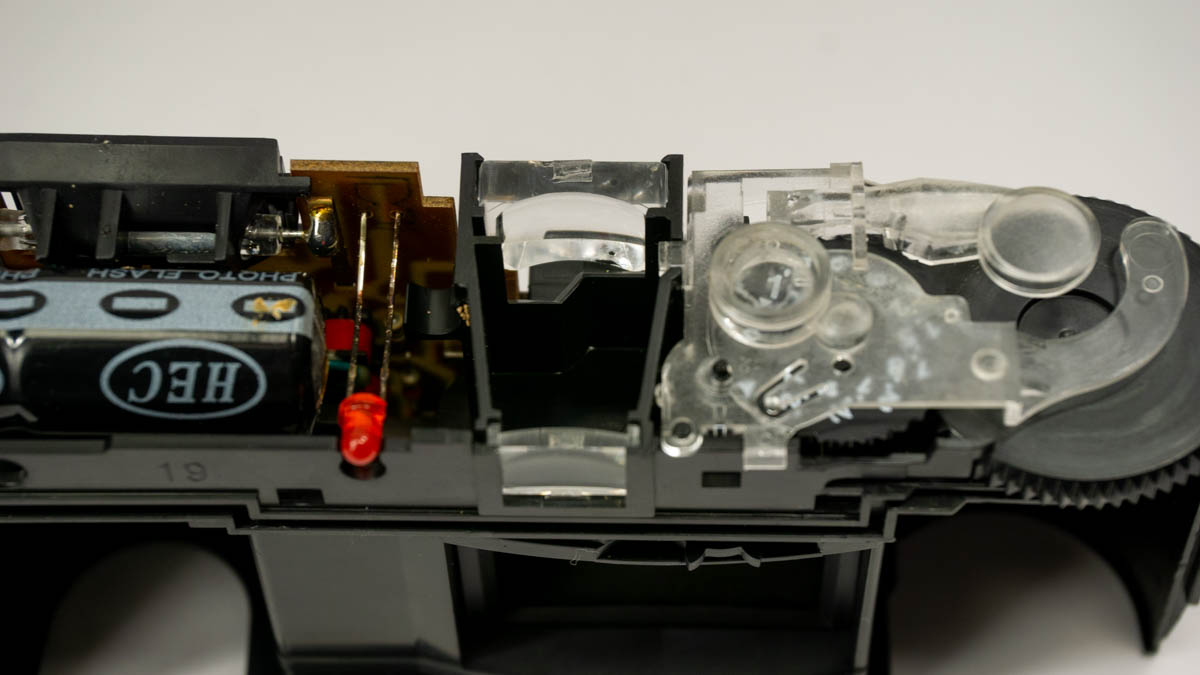
Mandatory safety warning: the battery in the camera is charging a capacitor for the flash. Even when the battery is removed, the capacitor may hold a charge. Use an insulated screwdriver to short the legs so you know it is fully discharged.
Some people find uses for these high-voltage capacitors as well…
Once you’ve peeled it from its shell it looks something like this:
There are a few different camera models out there but most of them look very much like the one I’ve got here.
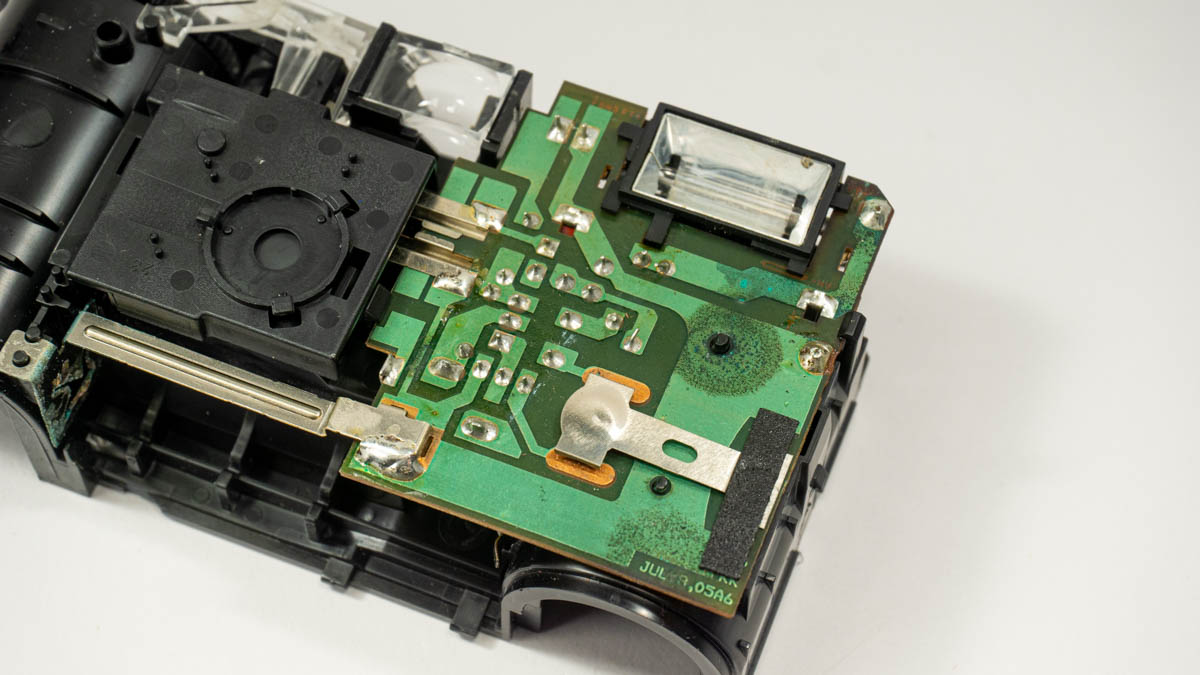
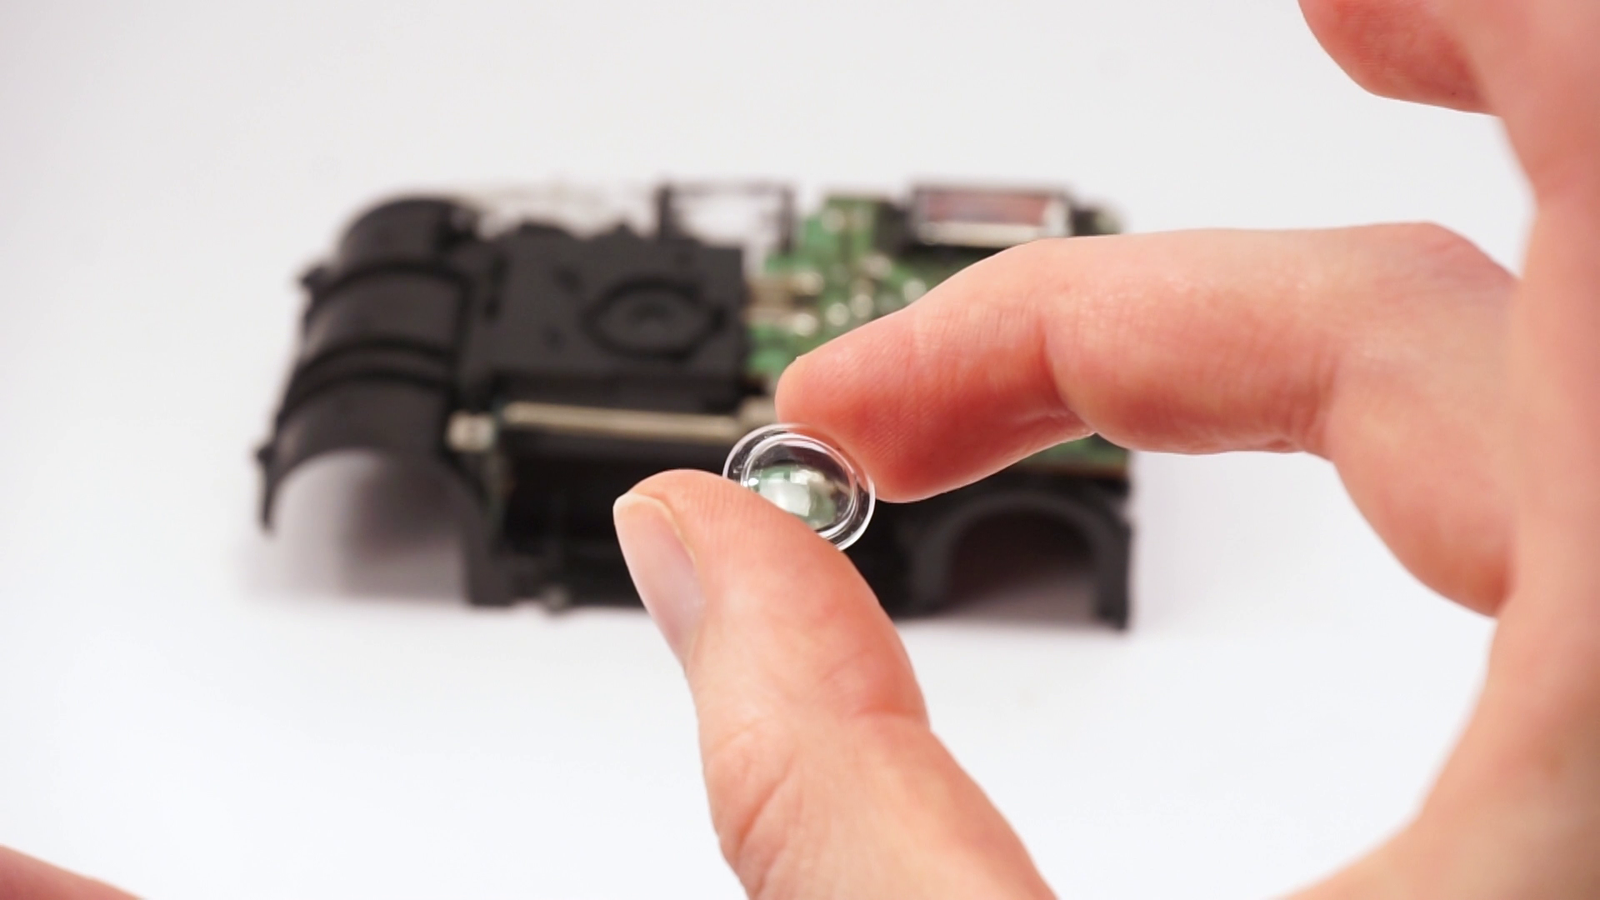
There is a circuit board for the flash, a bit of mechanics for the shutter, and a single lens, secured by a plastic ring. Just pop the ring or unscrew it and you’ve got the lens.
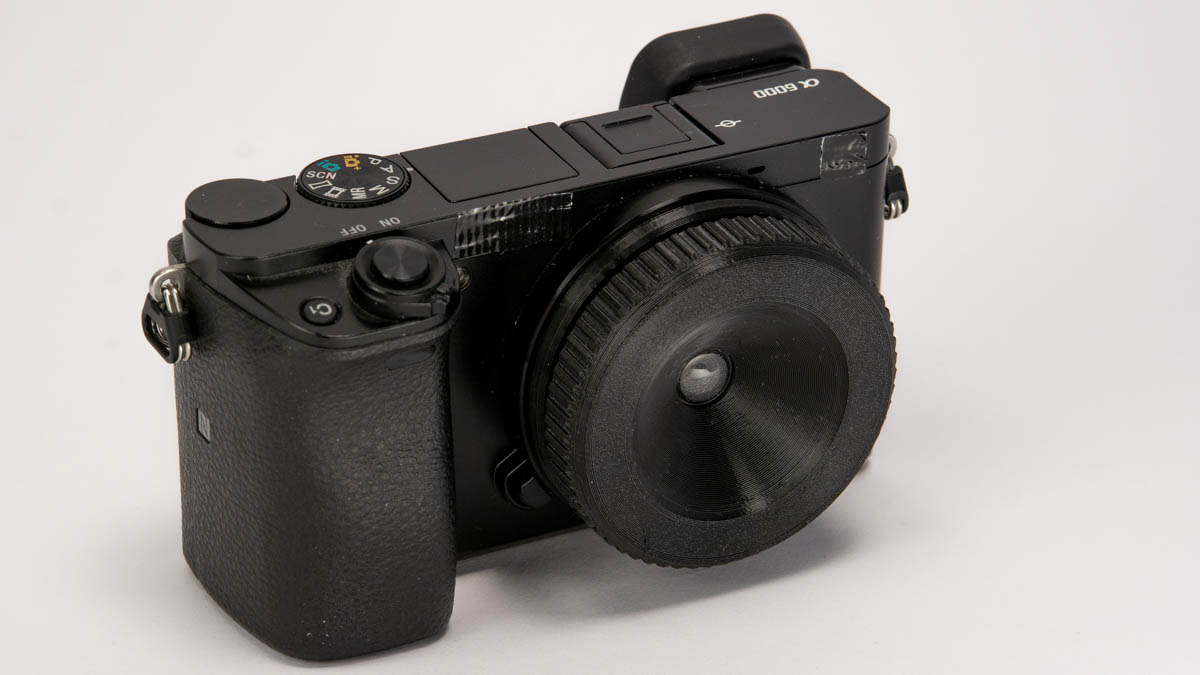
Step 2: Re-assembly
I designed a 3d-printable lens housing for Sony E-mount cameras (link below) and we just need to put the lens in there. Screw it together and we’re ready to go.
In the 3d-model you can define your aperture size. The camera has an f/11-size hole, so we’ll go with that as well.
Step 3: Testing
Testing them on a Sony a6000 looks… well, quite shitty. At least if you zoom in at 100%.


Images are only sharp in the very center, there is a bit of blur overall, and a visible color cast. But I mean the disposable camera is meant to produce negatives suitable for a 15cm print, so it’s exactly as good as it needs to be for this task. On an APS-C camera, the 35mm are more like 50 and that’s quite narrow. Can we – maybe – get it a bit wider?
Step 4: Make a Wide-Angle Lens
One of the nice things about lens power or diopter is that it’s additive. Instead of one really powerful lens, you can line up two with half the power and get the same refraction of light, more or less.
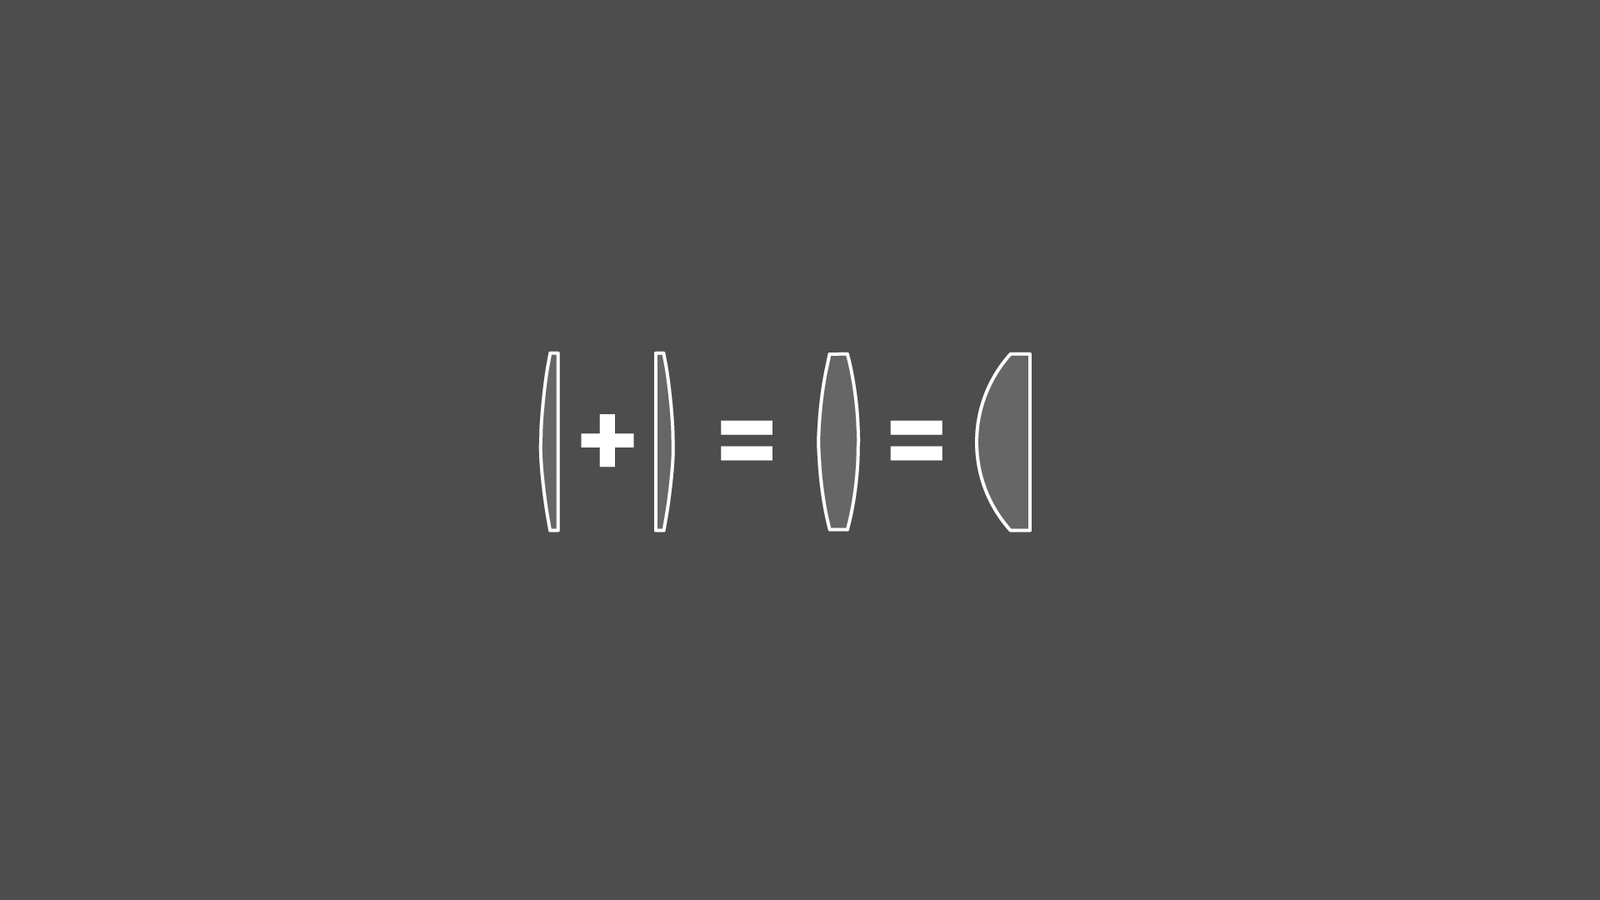
When looking at popular lens designs that’s a rather common pattern. If you want to learn more about the history of lens designs, I can recommend the lens genealogy article by Roger Cicala.
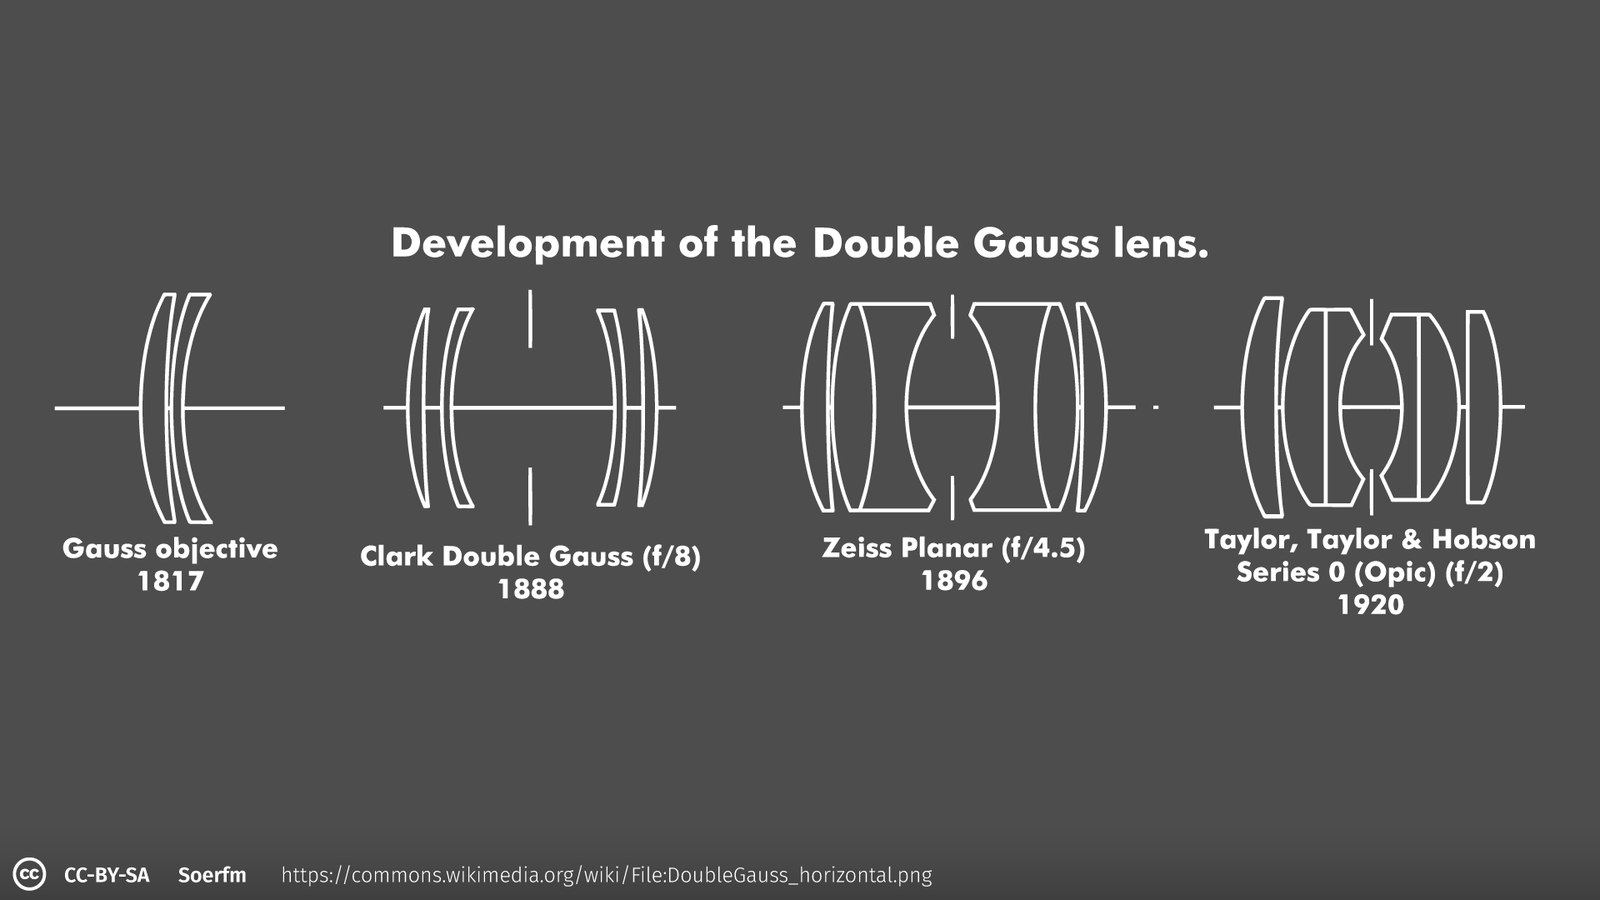
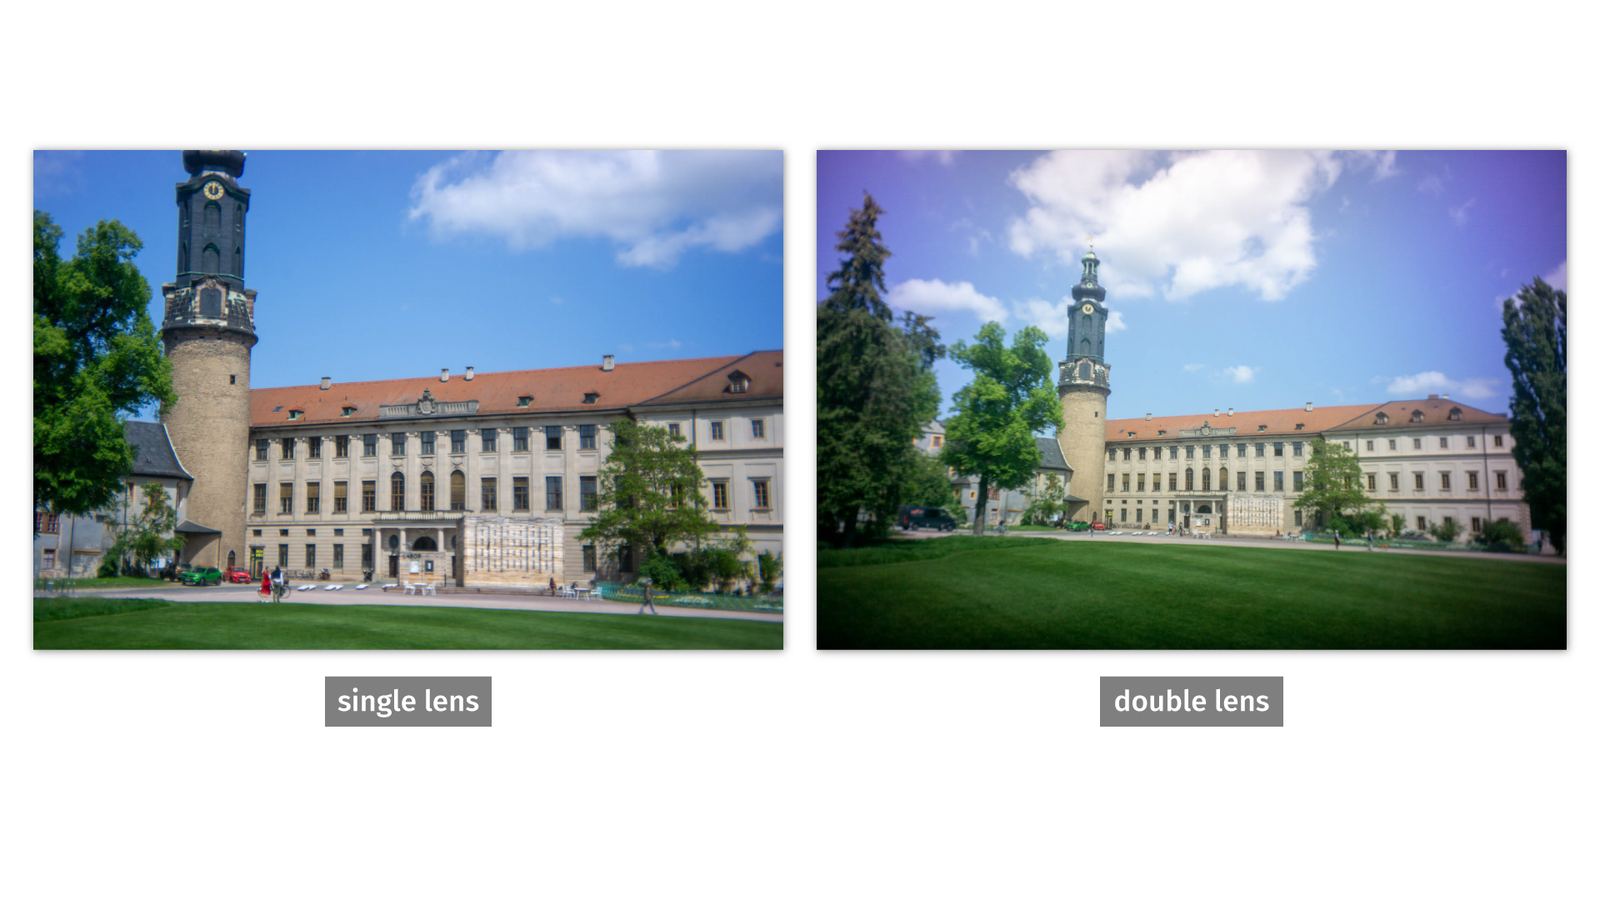
So, let’s salvage a second camera and put these lenses back to back. We just need to redesign our lens housing and print it again.
Twice the lens, half the focal length, our 35mm becomes something like 17mm on a full frame and 26mm on an APS-C camera.
Example images:

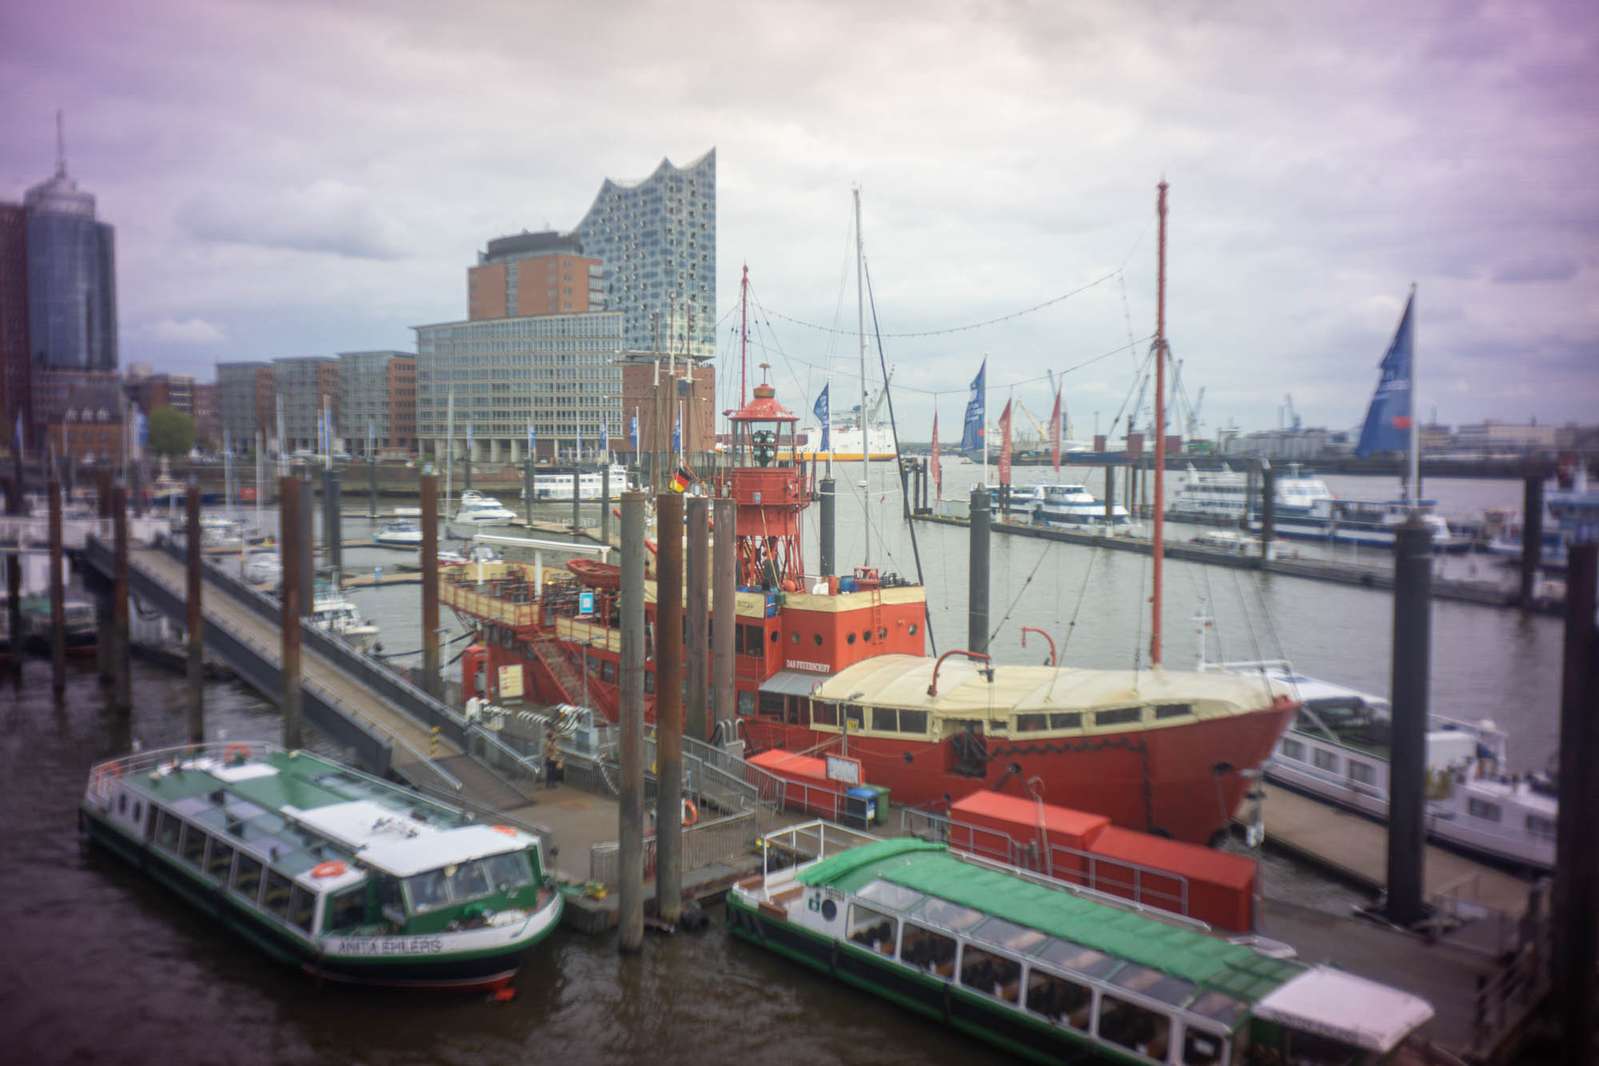
(All of the images have been taken with a Sony A6000 APS-C camera)
I have to admit, I kinda like the purple vignetting and generally this plastic Holga toy lens look.
Make your own:
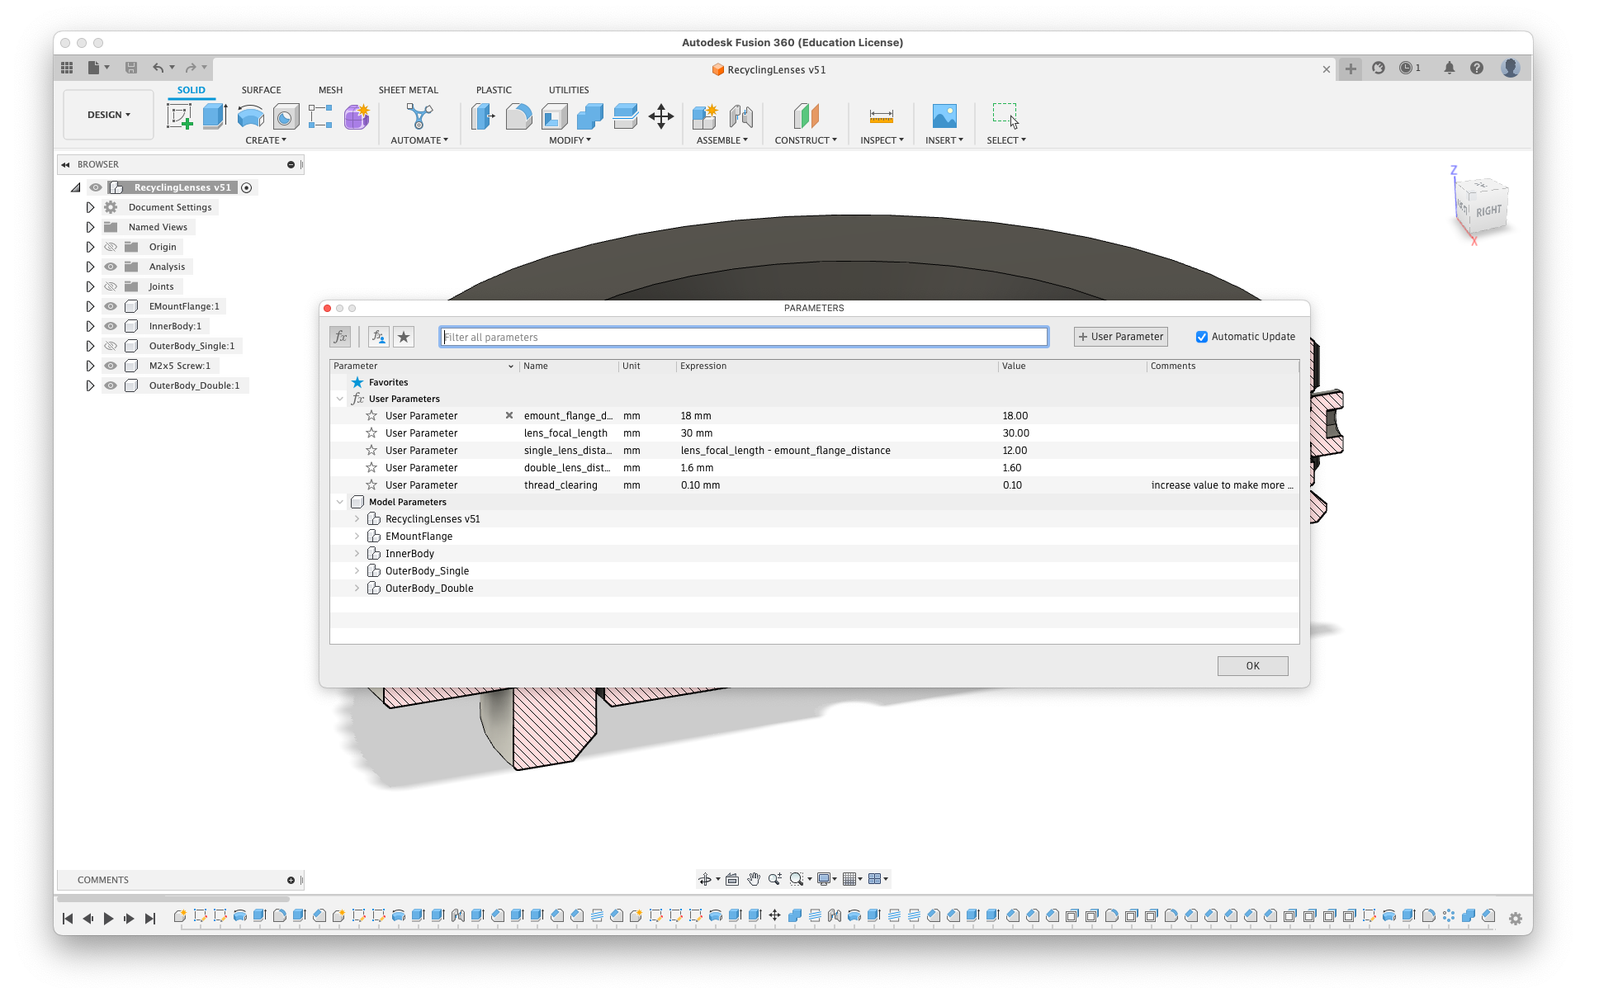
What do you need if you want to do the same: A 3d-printer, a bit of glue or M2 screws, and a disposable camera. I used Ilford-branded ones but that’s a common type sold as wedding cameras as well. If the lens from your camera is slightly larger, you can easily change the parametrized 3d model if you are using Fusion360.
You just need to load the file, select the MODIFY drop-down menu in the top bar and click on Change Parameters. The parameter names should be self-explanatory.
Assembly is easy:
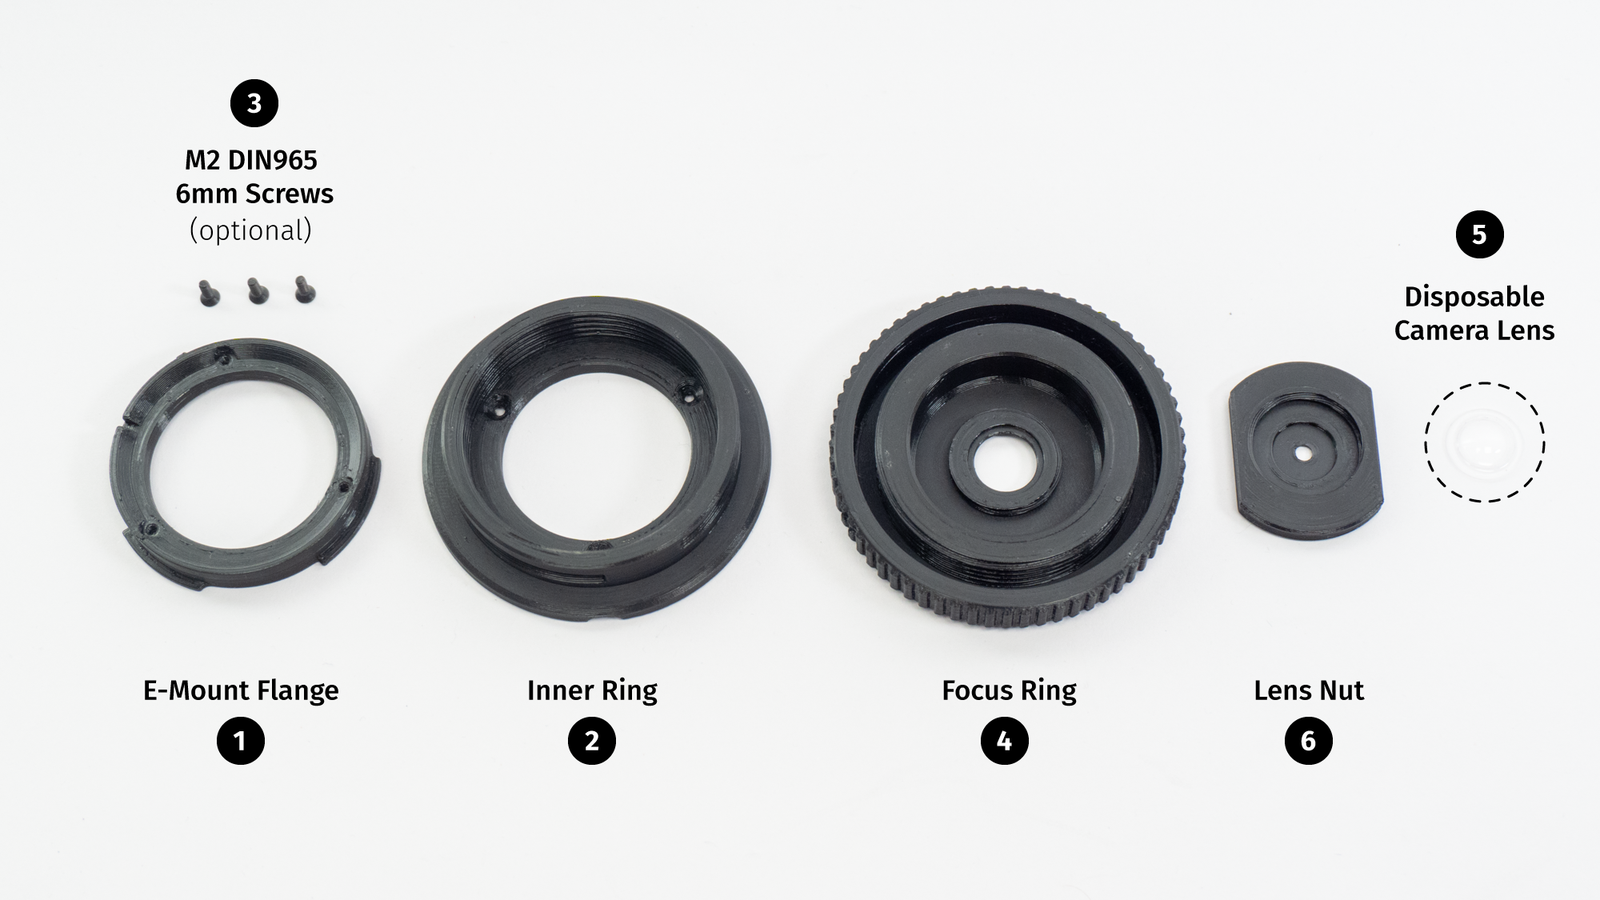
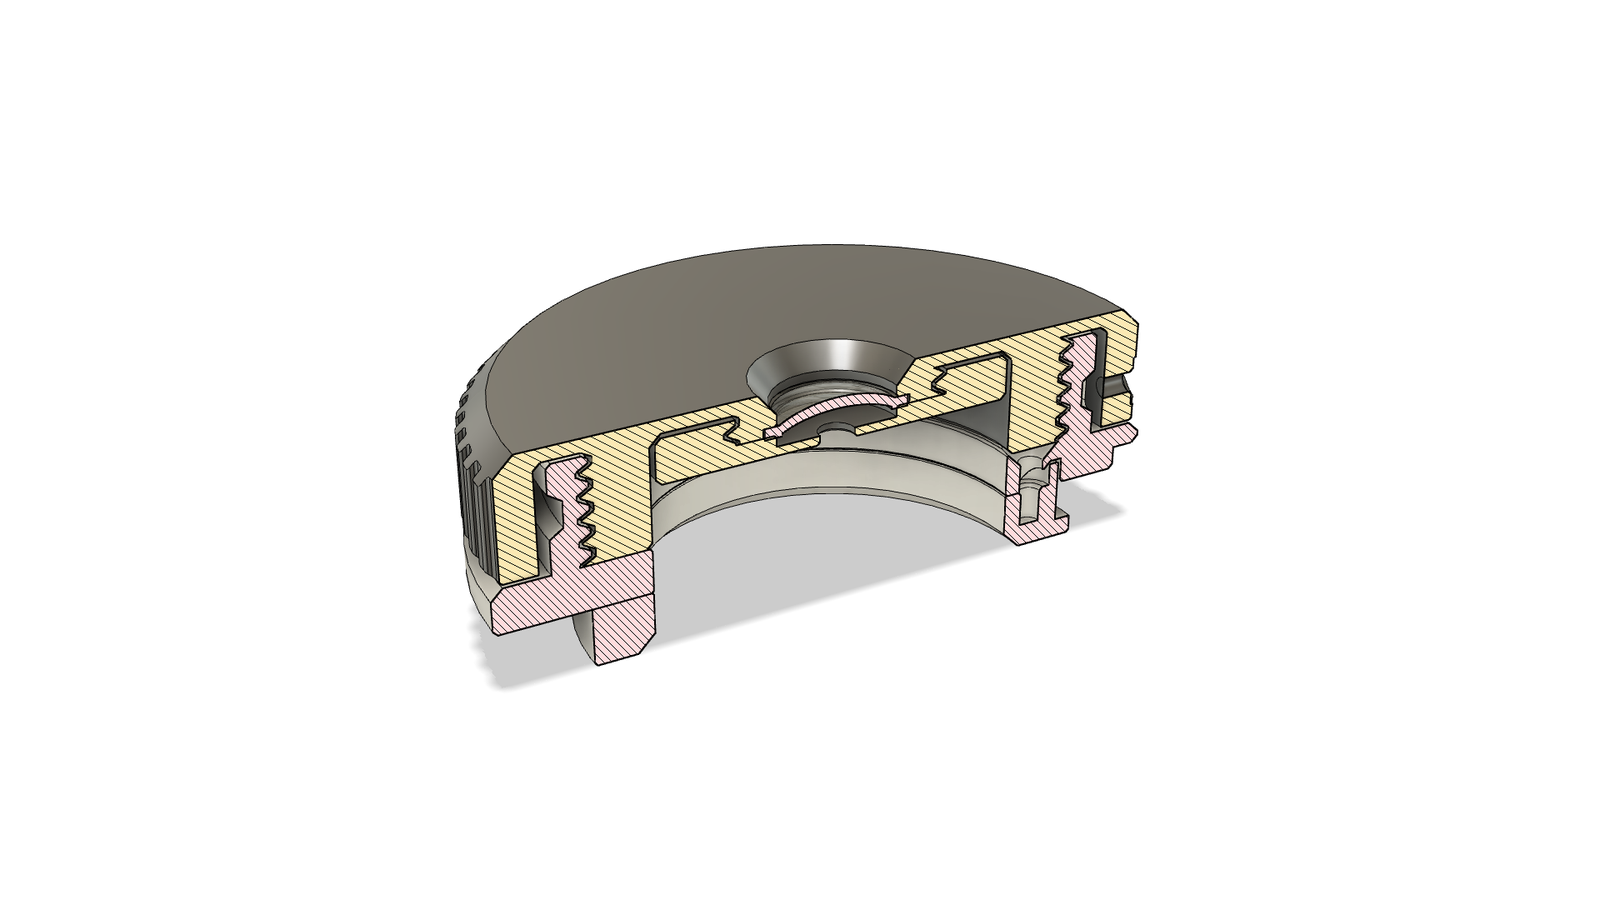
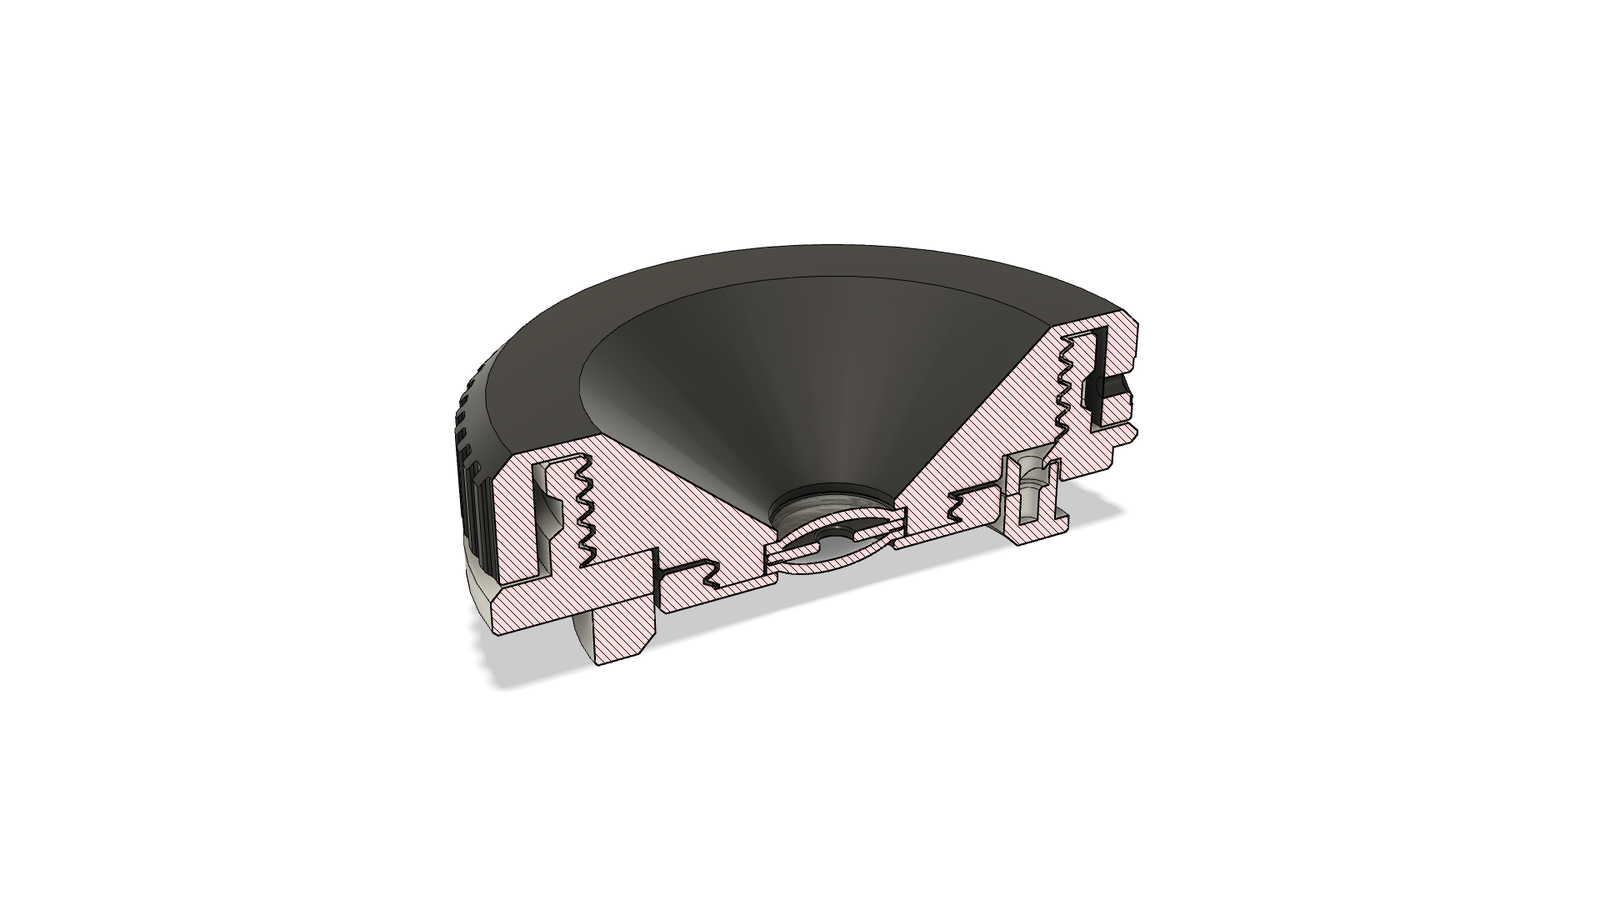
Attach the e-mount flange (1) to the inner ring (2). You can do this either with a bit of superglue or three M2 DIN965 6mm screws (3). There is a tiny tooth in the inner ring that fits into a gap in the flange, so there is only one way to fit these two parts together.
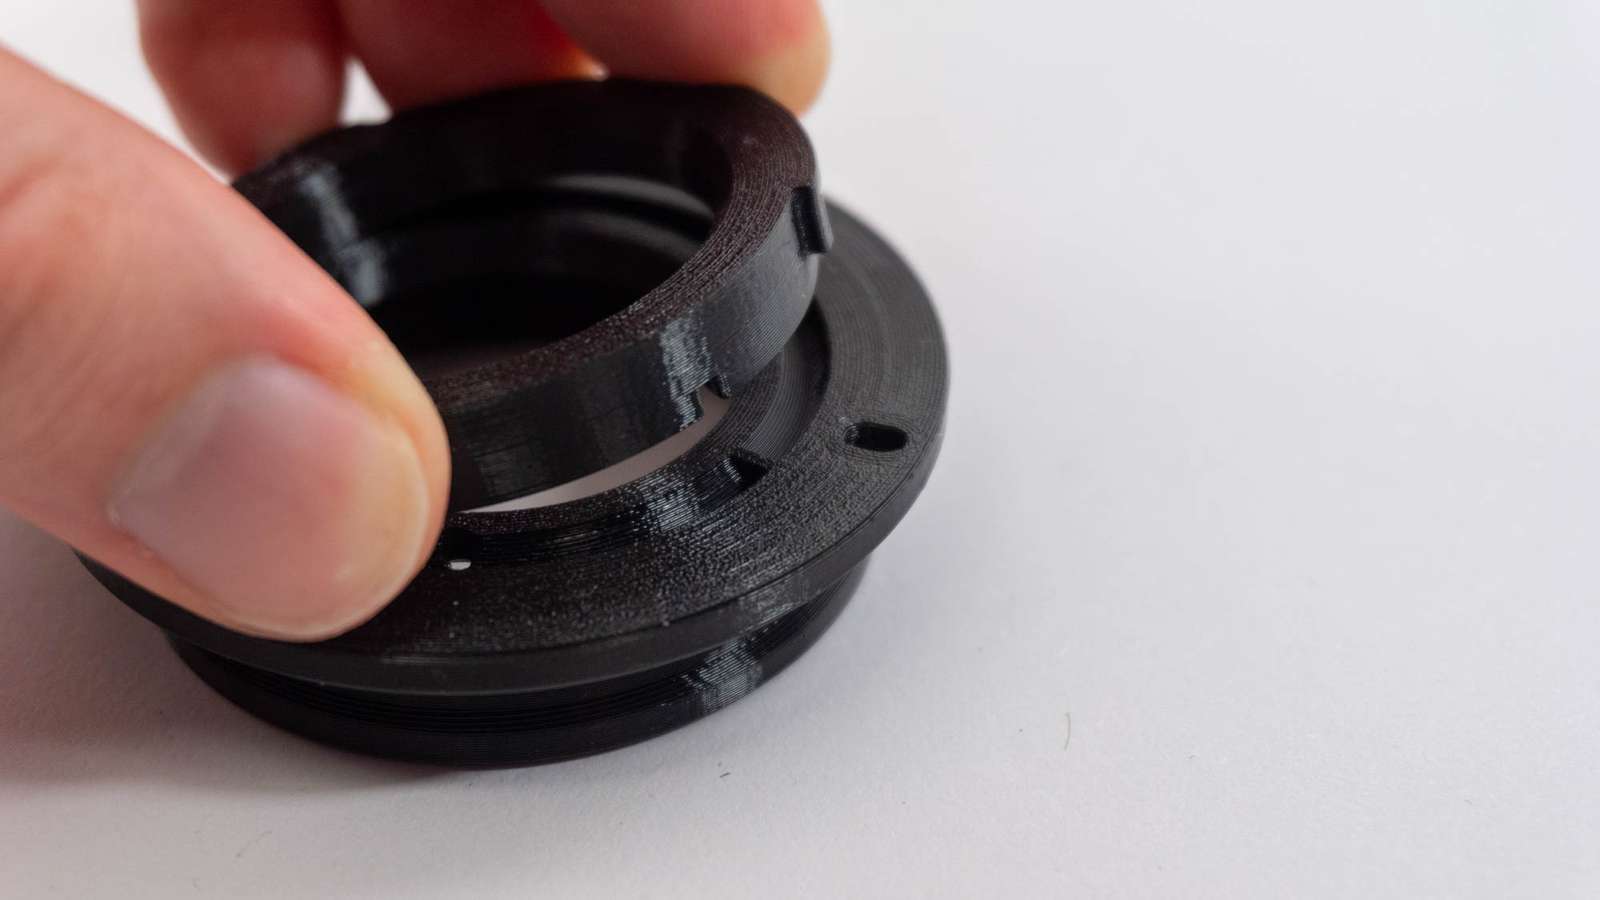
Then grab the focus ring (4) and place the lens (5) in the center. The lens has one side which is curved outwards (convex) and one side which is curved inwards (concave), but on the concave side, the lens could lay flat on a table. Place the lens in the focus ring so the curved side (convex) is pointing outwards to the front.
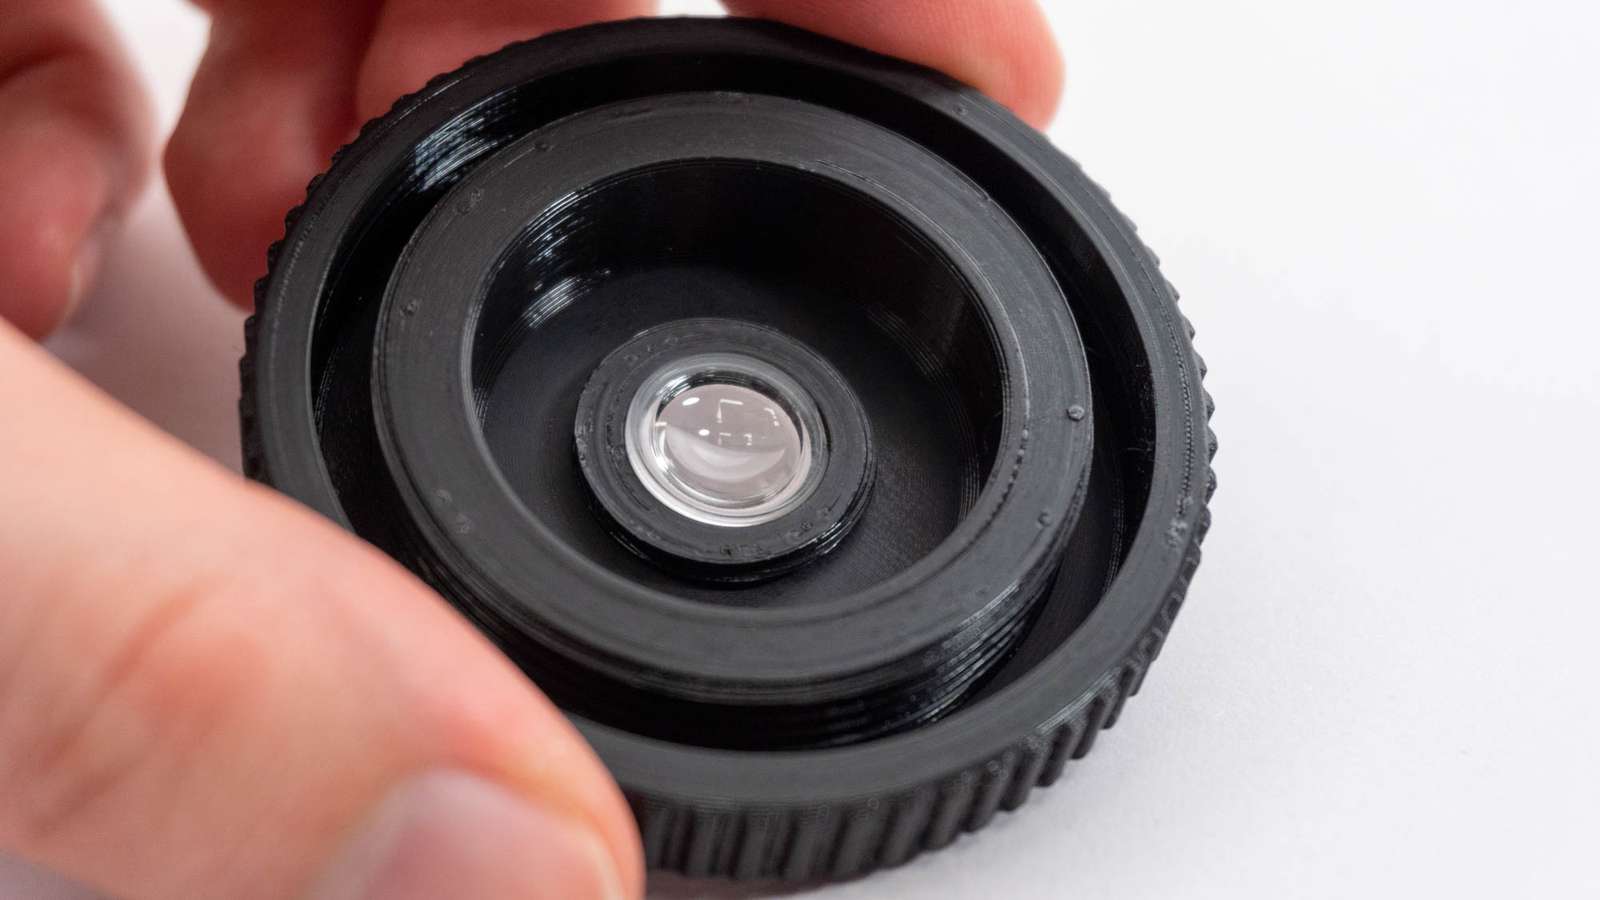
Grab the lens nut (6) and screw it on the threads around the lens. The lens nut should now press against the “flat” (concave) side of the lens.
Screw the focus ring (4) on the inner ring (2) and you’re done. The very last step is optional. If you’ve got another M2 screw you can screw it into the focus ring (without touching the inner ring) to create a hard stop for the focus ring. Then it’s not possible anymore to unscrew the focus ring by accident and there is a reliable “focus at infinity” stop.

For the double-lens variant you just need to replace the focus ring and add the 3d-printed shim part in between the first and the second lens. The two lenses should be placed like a mirror (flat side against flat side with the shim between them).
That’s it! Lens is done.
So, I am really not the first person coming up with these ideas. There are a lot of videos about re-using Kodak FunSaver lens assemblies in body caps and a Japanese company is selling double-lenses built from salvaged Fujifilm QuickSnap cameras. Someone even built a three-lens wigglecam. I’ve linked all of them below.
Last thing: if you don’t already have one at home please don’t buy a disposable camera. It’s not the 90s anymore and there are a lot of great alternatives if you want the disposable camera look but they are actually infinitely re-usable and pretty cheap:
- Kodak M35
- Kodak M38
- Harman ez 35
- The RETO project cameras
- Ilford Sprite 35 II
- Ilford Rapid Retro
- Agfa Reusable
Don’t create avoidable waste.
Files:
- The Fusion360 project file F3D / STEP
- The STLs in a ZIP and on printables.com
Related things:
- Matthieu Stern from the Weird Lenses youtube channel on Kodak Funsaver Bodycap lenses: youtube
- A double-lens based on Fujifilm QuickSnap cameras: the GIZMON utulens
- The 3D stereoscopic wiggle lens by George Moua
- The Kodak Funsaver printed lens adapter by George Moua
- The KEKS Kodak Lens
Fine print:
This post and all images/videos are licensed under CC BY.
(If not indicated otherwise. CC images/videos published by other people with different licenses are labeled as such. Public domain images are not labeled.)
You are free to Share — copy and redistribute the material in any medium or format and Adapt — remix, transform, and build upon the material for any purpose, even commercially. But you need to take care of Attribution — You must give appropriate credit, provide a link to the license, and indicate if changes were made.
See the FAQ for more info.